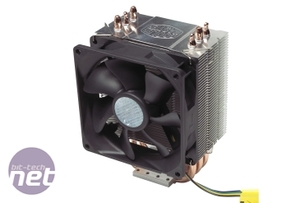
Cooler Master Hyper TX3
Manufacturer: Cooler MasterUK Price (as reviewed): £14.84 (inc VAT)
US Price (as reviewed): $19.99 (ex VAT)
The Hyper TX3 is the baby of the group, being significantly smaller than the other coolers and also significantly cheaper than any other cooler at £15 (or $20 if you're of the North-American persuasion). However, our experiences with LGA1366 Core i7 CPUs have given us a certain prejudice toward small coolers - only massive Core i7 coolers seem to have the cooling power to handle a big overclock without the CPU frying.
Our hopes, therefore, weren’t altogether high for this cooler given its size compared to the underwhelming Zalman CNPS 10X Extreme. We were even less enthusiastic when we saw that we practically had to build the cooler from scratch. The heatsink comes with none of the four push-pin legs attached, and the fan isn't clipped on either. We’re surprised that Cooler Master didn’t make us solder the fins to the heatpipes too.
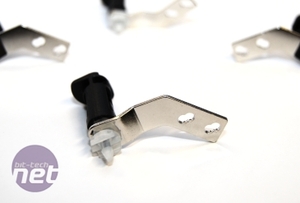
As with the Cooler Master Hyper 212 Plus, this is a cooler designed for every type of socket from AMD and Intel, and as such features two overlapping screw holes for the four separate push-pin legs. To attach the legs, you need to work out which of the four holes you need to screw into per leg. The manual isn’t overly helpful as to which hole to use, and we had to rely on our LGA1156 socket knowledge to truly decipher it.
As LGA1156 is larger than LGA775, the LGA1156 holes are a bit further apart. We therefore knew we had to splay the legs as far apart as the screw slots would allow. Eight screws and four minutes later we could move onto attaching the fan. The clips are similar to those of the 212 Plus in that they have integrated finger handles. However, we didn't quite appreciate this at first (again, the manual wasn't overly helpful) which to lead Rich, James and myself shouting all sorts of obscenities at the poor little TX3 and it's mother as we tried to get the fan on.


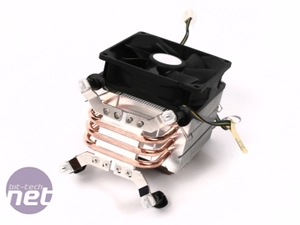
Left: The four push-pin legs have to be attached by two screws each. Right: the Cooler Master Hyper TX3 in situ
More by fluke, after the clip sprang off for the fiftieth time, I finally realised that the clips attach in what you'd typically think was a backwards fashion. And then the little bends in the wire do act as handles, allowing you to clip the wire into the cut-outs of the heatsink. Then you just apply some of supplied Cooler Master TIM and attach the cooler in the standard Intel push-pin way. The heatsink and fan are sufficiently small that you can get your fingers in and around to push the pins into place, and the fan has a 4-pin header, for PWM goodness.
Results and Conclusion
Even at idle the PWM-controlled TX3 is loud, and not particularly good at cooling either, with an idle delta T of 15°C. Under full load, the cooler was dicing with the Tjunction, only just maintaining a temperature within the bounds of Intel’s thermal spec with a delta T of 74°C. Under load the fan was very loud, though at least the sound was more whoosh than screamy, despite the 92mm fan.- Features
- x
- x
- x
- x
- x
- -
- -
- -
- -
- -
- 5/10
- Performance
- x
- x
- x
- x
- -
- -
- -
- -
- -
- -
- 4/10
- Ease of Use
- x
- x
- x
- x
- x
- -
- -
- -
- -
- -
- 5/10
- Value
- x
- x
- x
- x
- x
- x
- -
- -
- -
- -
- 6/10
- Overall
- x
- x
- x
- x
- x
- x
- -
- -
- -
- -
- 6/10

MSI MPG Velox 100R Chassis Review
October 14 2021 | 15:04


Want to comment? Please log in.