Setting up Six-Screen Eyefinity
The idea of six-screen Eyefinity is to give you one Single Large Screen (SLS), so the aim when setting it up is to have no gaps between the six screen bezels (the plastic frame of the screen).For this, you need some kind of multi-monitor mounting device: the one that ATI supplied was a monster scaffold with six adjustable VESA mounts. The immediate downside for ATI is that it’s not readily available and requires some considerable cost. Building the scaffold was relatively straightforward, but it was tilting the screens into position that took the most time – pushing a tugging the two screen-support bars and the adjustable mounts so that we could see no gaps was a lengthy job.
The next step is to calibrate the driver with the in-built bezel correction. A simple multi-screen setup normally has no correction for the gap between the screens - windows snap from one panel to the other, rather than seeming to move behind the space between the screens. However, this was seen as imperfect for a Single Large Screen (SLS) setup, as the desired effect is to be staring through a giant window beyond into a game. The PC therefore has to be told how much space to leave between the six panels to create this effect – this is bezel correction.

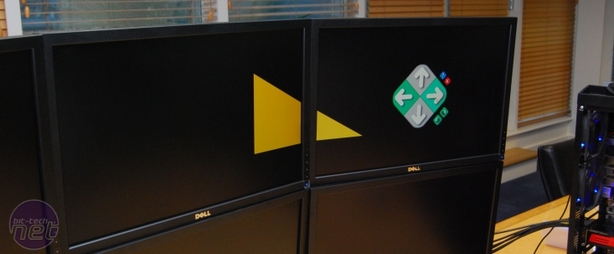
Bezel correction works by lining up triangles across two screens - you need ensure that the lines match up. Click to enlarge
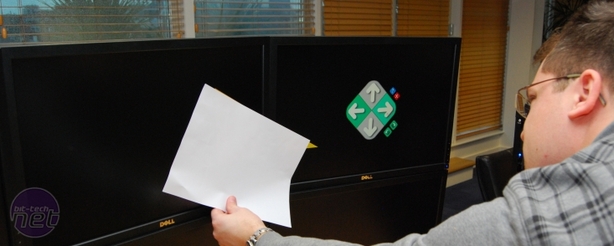
Bezel correction is setup by first telling the driver the layout of your six screens. This is an easy process of clicking boxes in windows that correspond to each screen. The next step is a touch more tricky, as you need to tell the driver exactly how much space to leave for the bezels of your screen. The ATI driver does this by drawing triangles across two adjoining screens, and you need to move the triangle so that the edges appear to match up. We used pieces of paper to tell exactly how everything lined up, which was a touch fiddly because the table was quite wide, but as you’d expect six monitors can’t sit too close to you either.
We came back to this a week later and Rich started from scratch - without the benefit of ATI's instruction it took most of the day for him to find the single option in the drivers that was to "create a GRID" and not enable each monitor separately. This option initiates the series of setup guides above. We hope ATI makes this option more apparent for real Eyefinity end users.
Calibration done then, we could start playing some games.
Which Games Work?
ATI has a list of qualified and supported games for Eyefinity, but for some reason it’s rather hidden on the AMD website – the search doesn’t find it, and the page is hardly well surfaced. To help you (and us) out, here’s the Eyefinity game support page at time of writing. It’s not an especially long list, but AMD says that most games will be compatible with Eyefinity to some degree.The only real enhancement that comes with qualification or validation is that the HUD elements of an interface will be pushed closer to the central screens. Anyone that’s used Matrox’s TripleHead2Go will remember that if a game doesn’t know that your display is three screens wide, the HUD gets so stretched that you spend all your game mousing from one side to the other, or straining your neck as you turn from the left screen to the right. The downside with Bezel correction though is that not every game can be calibrated for every possible screen and bezel size, so sometimes you could be left with essential HUD information getting completely lost in the pixels between the physical screens.
We tried a couple of qualified games for the demo: Race Driver: GRID and Tom Clancey’s HAWX. ATi is leaving the kit with us for a little while, so we’ll go through more games at a later date. While HAWX looked fine, unfortunately none of the people present were that into flight sims (Antony and James were mostly busy, and could only drop in for a few minutes later on). We therefore spent most of our time with GRID.

MSI MPG Velox 100R Chassis Review
October 14 2021 | 15:04


Want to comment? Please log in.