Rear I/O
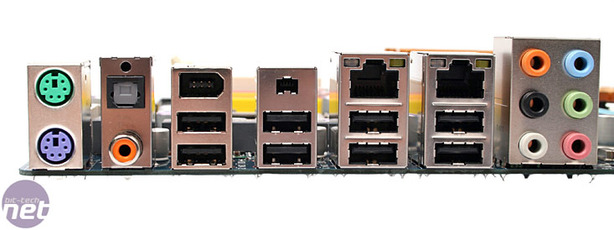
The rear I/O features:- PS2 keyboard and mouse
- Optical and RCA S/PDIF
- Eight USB 2.0 sockets
- Two Firewire connectors - one 6-pin, one 4-pin
- Two RJ45 Ethernet sockets
- Six 3.5mm audio jacks for 7.1 channel surround sound, plus microphone and line-inputs
BIOS
The first thing you do if you buy this board is to update the BIOS. With the first P45 boards we reviewed around launch we learnt that there was still a lot of development taking place, and although the Gigabyte EP45-DQ6 and Asus P5Q Deluxe worked out well, MSI's P45 Platinum was not so lucky, essentially failing because of its poor BIOS.At the time of writing the board is shipped to us with the F4 BIOS and it was pitiful. We had VGA and memory compatibility problems from the outset and when we finally did get the OS to install, we mistakenly tried to flash the BIOS with @BIOS and learnt that our sheer laziness was our downfall. Thank the heavens for Gigabyte's dual BIOS and effective backup system that's all I can say - at least we can comment that this works very well!
We grabbed the latest F9f from the Gigabyte website and used the in-BIOS QFlash to upgrade it instead. It made a world of difference in stability and compatibility. One thing we did find when tweaking the memory settings in particular was that it requires some gentle pushing rather than large jumps. We were able to optimise the memory subsystem pretty well but only after several restarts and profile saves to make sure we didn't lose anything.
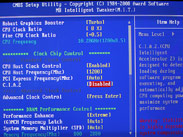
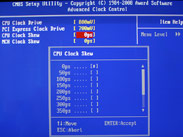
As usual the M.I.T. (Motherboard Intelligent Tweaker) section is where all the action is, and as usual the BIOS layout is exceptionally intuitive with very clear separation of the sections and sub-directories. The total CPU frequency is displayed right above the frequency control section helping you keep an eye on things, and the advanced clock control holds the key to 50ps clock skews (only positive) and clock drive voltages for CPU and PCI-Express.
As with the DQ6 model the northbridge frequency latch is either separated or works in tandem with the memory frequency divider making things easier to use, depending on what you're used to - personally we prefer to set the chipset frequency first then see what memory divider options are available.
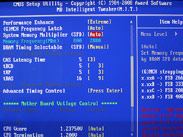
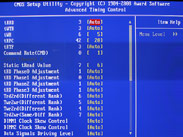
The memory timings are split between the standard set of four that most people will use and the advanced stuff buried in a sub-directory. Pretty much everything useful is included, although when we tried to set the Command Rate to 1T it would not reflect this once the settings were saved and when read by Windows software. Other advanced settings include per channel tRD adjustment with phase adjust (0 or 1, referring to Phase pull-ins), as well as per DIMM clock skews and drive strengths - basically, virtually everything you need to eek a grain of performance out of memory is at your disposal.
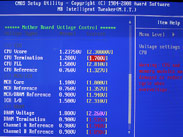
Gigabyte has also displayed the voltage adjustments in a very simple way, yet has made what's available potentially very powerful - there is plenty of voltage overhead across the board unless you're going to extreme levels of overclocking (for which the board isn't designed for anyway) and the CPU Termination voltage directly affects the CPU and MCH reference voltages keeping the all important ratio intact. It's a more obvious way of doing things that we think is much better than just an ambiguous ratio or percentage, but an algorithm to calculate the ratio on the side wouldn't go amiss.
The voltages, like the CPU PLL and northbridge core could use a little more finesse in the level of adjustments, however for the most part what's offered is very good considering the price.
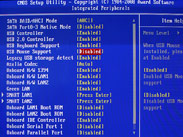
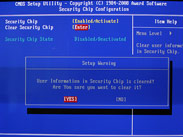
Other non-enthusiast features include the Green-LAN option which turns off unused Ethernet sockets to save power, as well as the TPM (Security Chip) functions, Q-Flash which offers in-BIOS, BIOS flashing from USB sticks (It's oh-so-very helpful!) and eight slots of BIOS profile saving with custom name support - that exceeds what everyone else offers, even Asus' Republic of Gamer series or DFI LANParty.
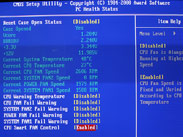
What Gigabyte could use is some more advanced fan control. At the moment in the PC Health section all there is "CPU Smart Fan Control" which basically translates to 4-pin PWM control for the CPU fan should you have one - there's no customisation of fan performance, either hardlocking it to a voltage or percentage, or having it correlated performance to temperature. Asus' Q-fan offers this sort of coverage and Gigabyte misses out entirely.

MSI MPG Velox 100R Chassis Review
October 14 2021 | 15:04




Want to comment? Please log in.