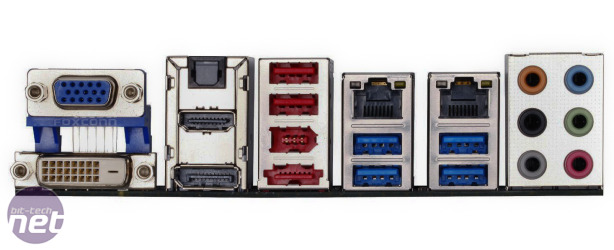
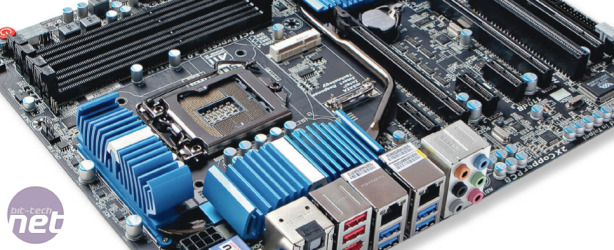
Gigabyte GA-Z77X-UD5H layout
Another area in which the UD5H is surprisingly well specced is in terms of video outputs. The board plays host to a HDMI, DisplayPort, VGA and DVI-D port - every display output you could possibly think of putting on it. Again this looks like a good thing on paper, but are they all actually nessesary?Granted Ivy Bridge CPUs come with a relatively capable onboard GPU, but are the kind of people who’re looking at a board with onboard voltage monitoring points, power buttons and SLI and Crossfire X support likely to be using it - we’d suggest not. We’d trade one of the connections for a EFI reset switch any day, as having to take the side off your case to correct a bad overclock is a pain we could do without.
Another interesting feature is the mSATA port located in the centre of the board. We’ve seen this on a couple of Gigabyte’s previous boards (and on a Sapphire board and the recently reviewed Gene via a daughterboard) and the idea is that it can be used for one of the tiny mSATA SSDs that are now readily available. Our opinion on it is very much the same as when we saw it on the Sapphire board - it’s a nice idea, but it seems a little redundant on a large ATX board. Why bother using a tiny SSD when you’ll need a full size case to hold the board? On an m-ATX or mini-ITX board however, we’re certain the idea of using a dinky SSD to save space for, say, a car PC or media PC would become a lot more compelling.
Finally, before we get onto the overclocking and performance of the board we just wanted to mention its styling. It’s clear that Gigabyte is trying to find a signature look for its mid-range boards and to this end it's ditched the black PCB and gunmetal heatsinks of its 6-series boards and moved to a black and blue theme for its 7-series efforts. Unfortunately we’re not certain this is a good move, as the black and blue theme looks, well, just a little bit Asusy. We were quite fond of the aggressive looking gun metal heatsinks and can’t work out why they’ve been shelved. Aesthetics is a purely subjective area however, so you may feel differently about the changes.
Gigabyte GA-Z77X-UD5H Overclocking
Once we’d strapped our test Intel Core i7-3770K into the UD5H, overclocking it proved to be an absolute doddle. This is of course partly down to the fact that LGA1155 CPUs are so easy to overclock that even our gran could do it, but Gigabyte have also played their part by laying out their new EFI logically and clearly. The only exception to this is that the voltage and multiplier options are on different pages, which necessitates a lot of flicking back and forth.After a little tinkering we had our test chip running at 4.8GHz. This required a Vcore of 1.37V and the load line calibration option set to extreme. This is a touch more Vcore than the same overclock required on the Maximus V Gene, but both overclocks remained rock solid.
This was also our first chance to get to grips with Gigabyte's new and much vaunted 3D BIOS EFI (because everything needs to be 3D now, right?), which aims to make adjusting settings in the EFI a simpler experience for beginners. It does this through presenting a picture of the motherboard you’re using and then highlighting the various different components on it that you can interact with. Hover the mouse over the CPU socket for example and you’ll get access to the settings relating to the CPU - do the same for the PCI-E slots and you’ll get a different bunch of options.
It’s a natty feature, and one that makes a lot of logical sense for beginners. We do however expect most bit-tech readers to be comfortable rummaging around an EFI, so you’ll be glad to know that you can dispense with it and instead use the normal interface which Gigabyte title Advanced Mode.

MSI MPG Velox 100R Chassis Review
October 14 2021 | 15:04


Want to comment? Please log in.