Exploring PSU Design and Testing with Cooler Master
December 17, 2014 | 12:58
Companies: #cooler-master
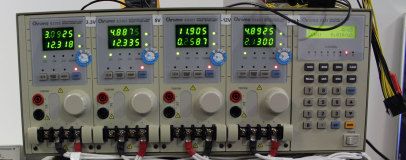
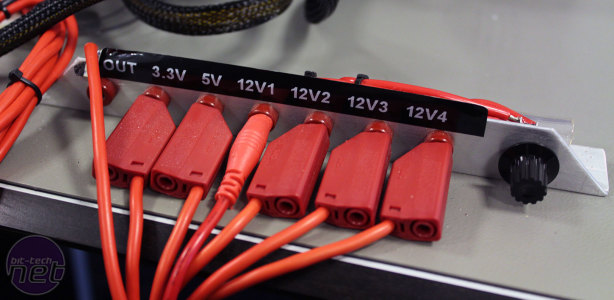
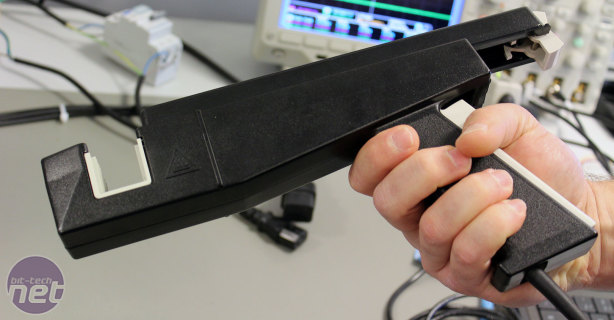
A simple switch (again low resistance) allows you to flick between the 3.3V, 5V and four 12V outputs. The reason there are four 12V outputs is so you can simulate multi-GPU systems by connecting numerous PCI-E power plugs to the PCB – it's important that high wattage PSUs can deliver accurate voltage to multiple demanding components at once.
Click to enlarge - This switch is connected to the multimeter, allowing you to choose which rail is being monitored
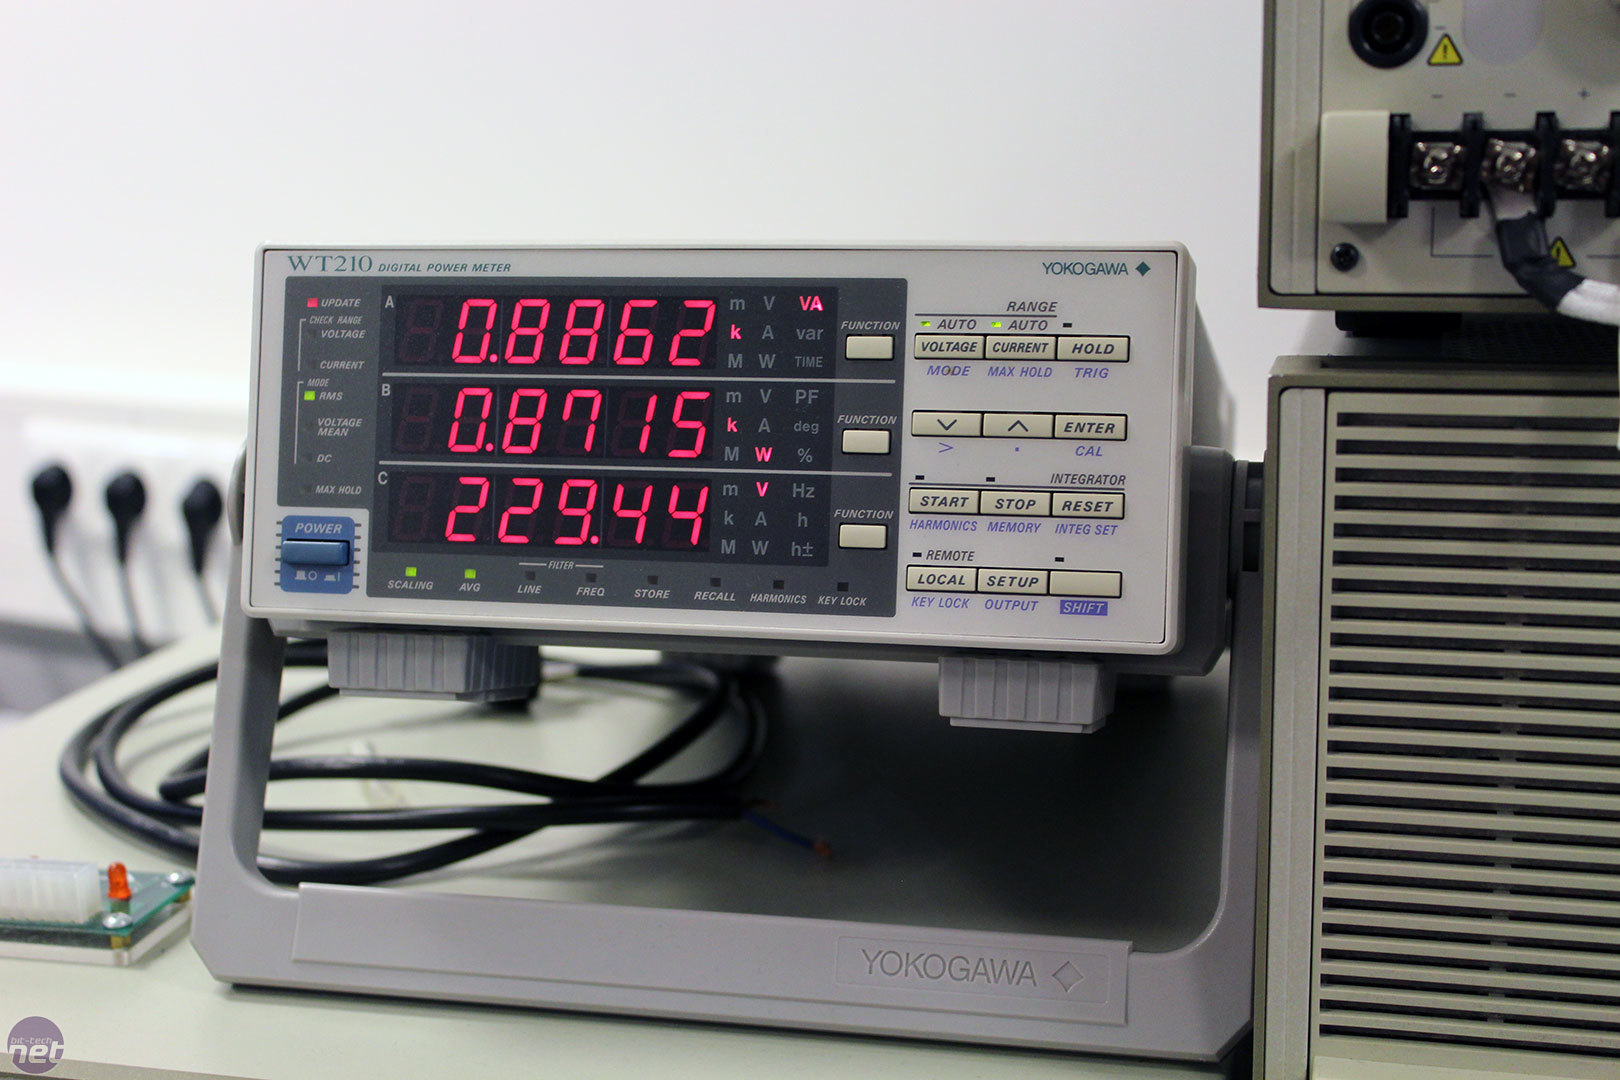
From the voltage and current readings, you get the real power being used by each rail and by the PSU in total. Dividing this by the input watts, as shown on the digital power meter, gets you your efficiency for the current load level, and you then repeat everything for the various load levels and electricity supplies (typically 115V and 230V to match 80 Plus procedure).
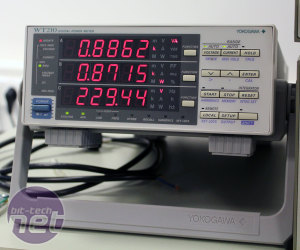
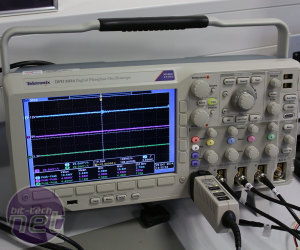
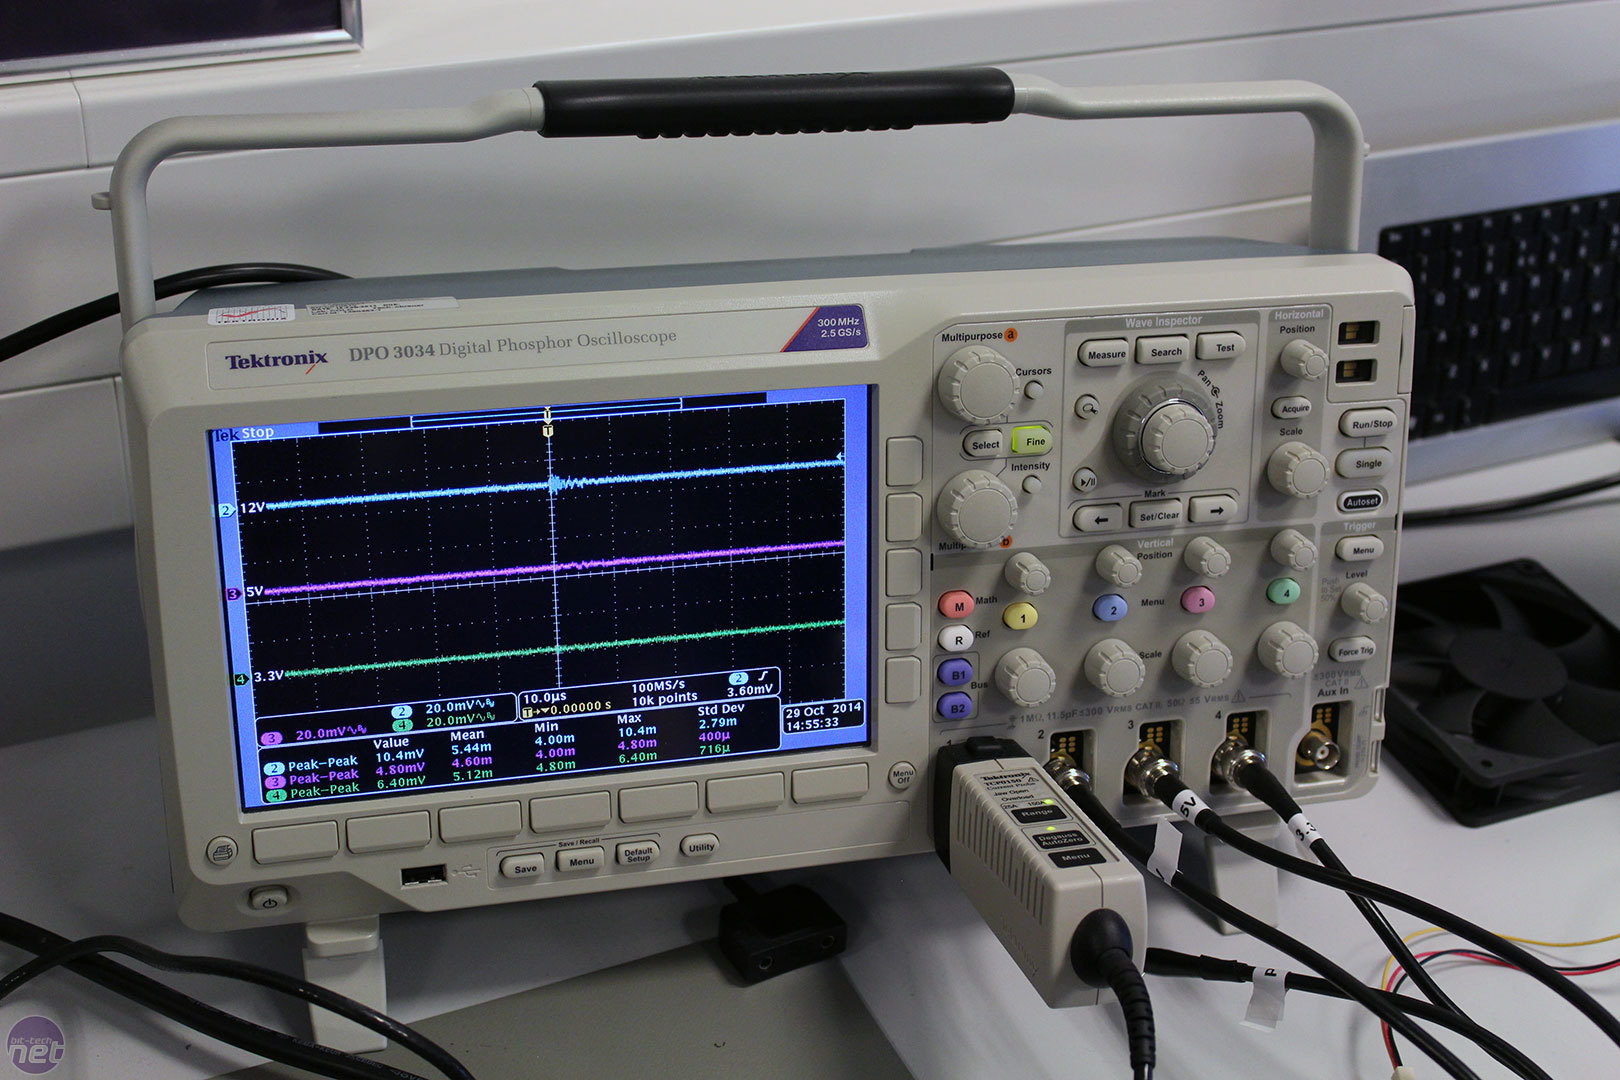
Click to enlarge - Power readouts let you calculate efficiency (left) and the oscilloscope (right) has multiple uses
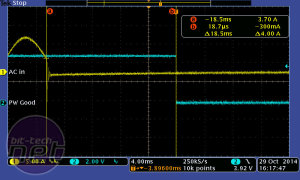
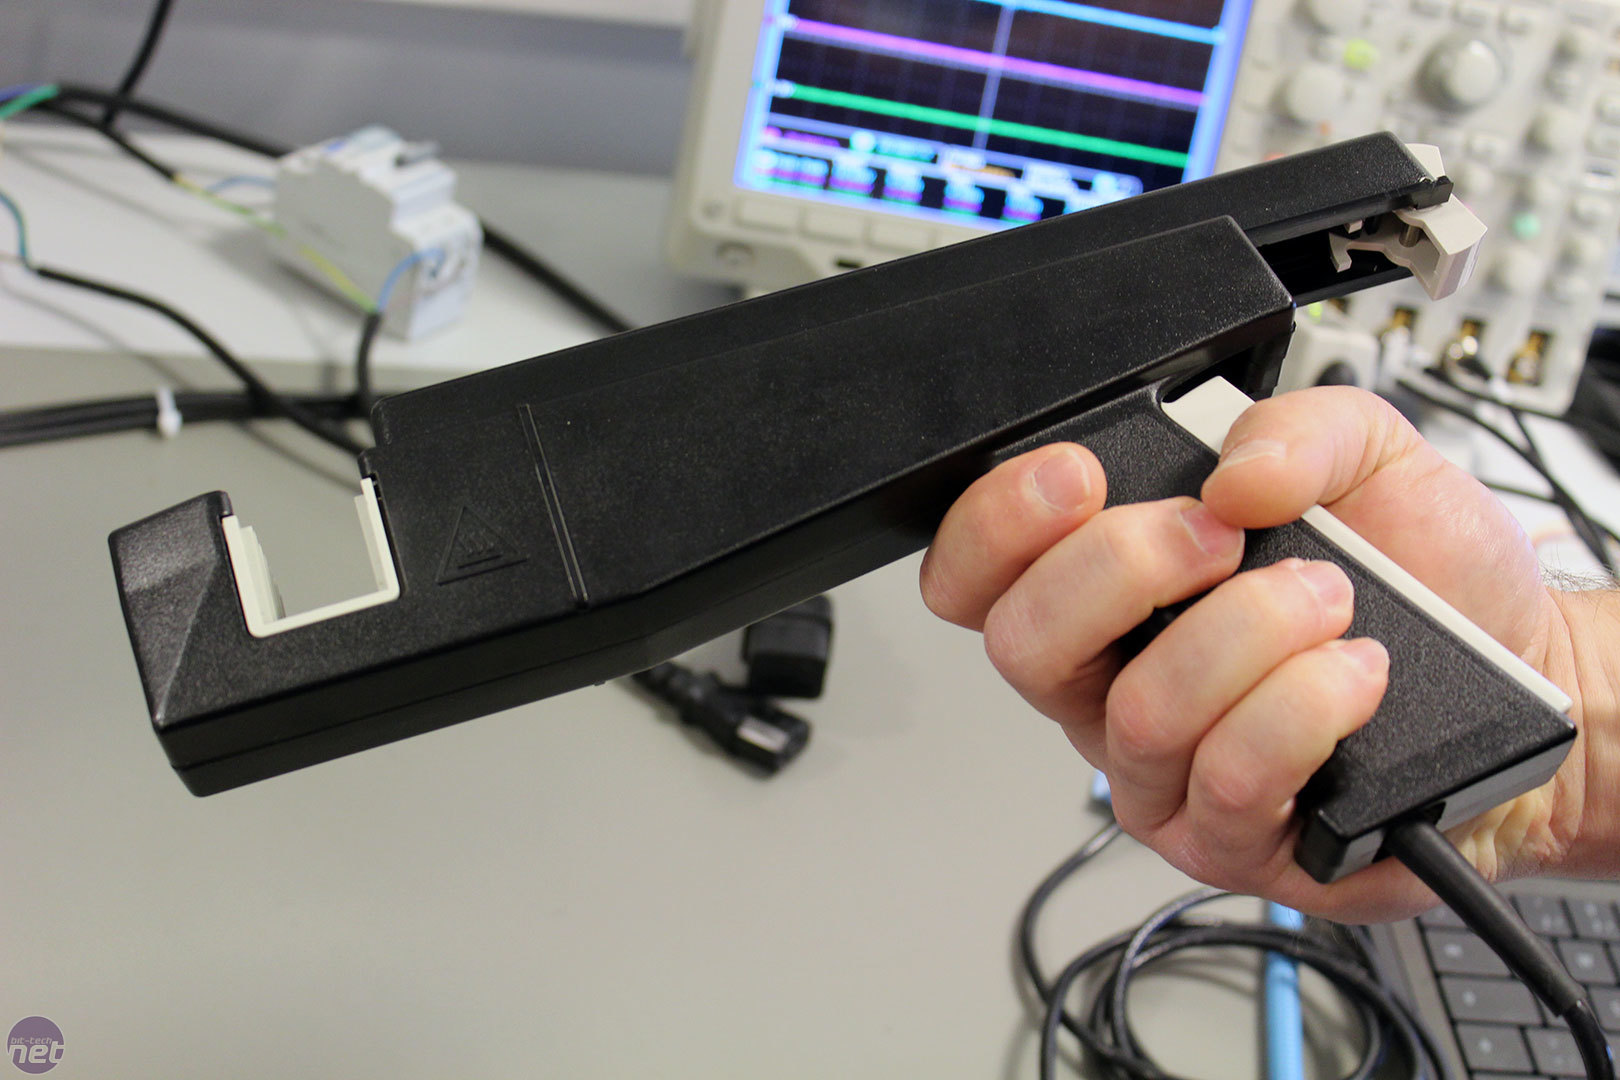
A current probe placed around the live brown wire of the power input cable measures total harmonic distortion on the Tektronix DPO 3034 Digital Phosphor Oscilloscope, which can output screenshots to a connected memory stick. The oscilloscope also receives inputs direct from the 3.3V, 5V and 12V rails via the custom PCB, which allows you to check the ripple on each of them. Finally, the oscilloscope can be used to ascertain a PSU's hold-up time (how long a PSU will supply power for in the event of power loss – this must be at least 17ms) and inrush current (the high burst of current drawn right as the PSU is switched on and the input capacitors are charged).
Click to enlarge - The current probe
The PSU we tested with Cooler Master was one of its G750M units, which is rated for 750W of power and has an 80 Plus Bronze certification. All in all, the results were excellent. Voltage on the 12V line range between just 11.91V and 12.08V, with all other rails safely within range as well. Efficiency for 230V input was measured at 85.6 percent at full load, 89.5 percent at half load, and 88.9 percent at 20 percent load, as well as 83 percent, 87.5 percent and 87.3 percent at the same load levels respectively for 115V input. These results confirm the G750M's 80 Plus Bronze rating.
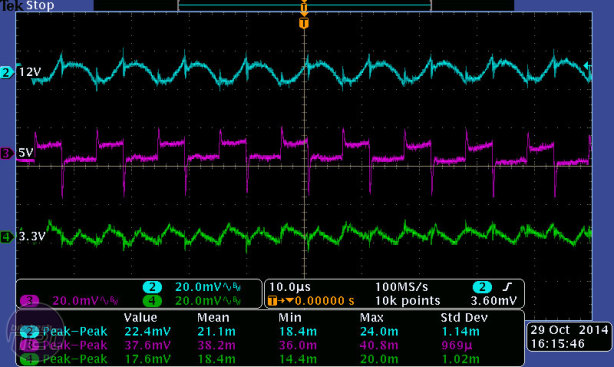
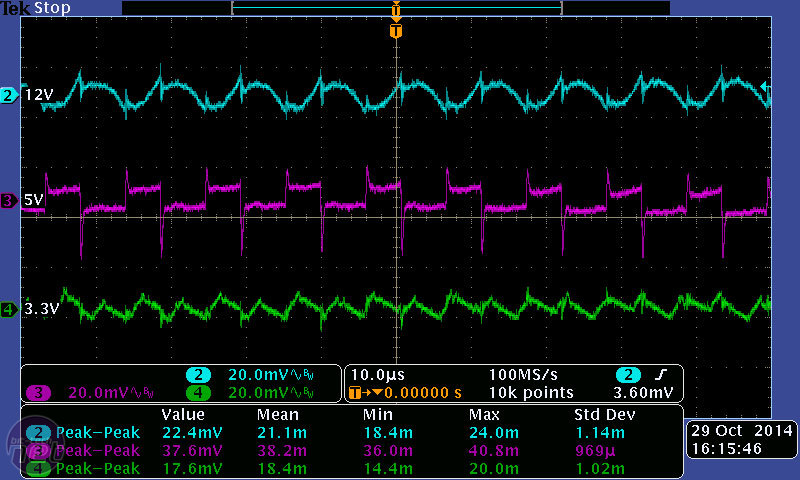
Click to enlarge - Ripple on the G750M
We were also impressed by the ripple results. Despite not being an enthusiast PSU designed for overclocking, the all important 12V rail had just 21.1mV of ripple at full load, whch is very low. The Intel ATX specifications permits up to 120mV of ripple here, and up to 50mV on the 3.3V and 5V rails, both of which also passed safely. We asked if Cooler Master had its own internal ripple targets lower than what the ATX specification defines, but we were only told that they change based on the model and on what the competition is offering.
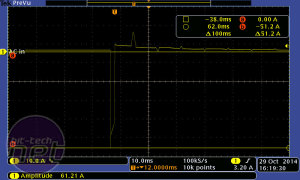
Click to enlarge - Inrush current and hold-up time on the G750M
With the main electrical results obtained, it's also important to test out the various safety features of a PSU, such as over voltage protection, short circuit protection, over current protection and so on. Some of these can be triggered manually (e.g. short circuits) and some will need the Chroma load generators which you can use to overload the rails. For each PSU, it typically takes between two and two and a half hours to run all the required tests.
Thanks go out to Cooler Master and especially René for taking the time to take us through the PSU design and testing procedures. This also concludes our coverage from our tour of the Cooler Master HQ – thanks to all who made it possible!

Click to enlarge - This switch is connected to the multimeter, allowing you to choose which rail is being monitored
From the voltage and current readings, you get the real power being used by each rail and by the PSU in total. Dividing this by the input watts, as shown on the digital power meter, gets you your efficiency for the current load level, and you then repeat everything for the various load levels and electricity supplies (typically 115V and 230V to match 80 Plus procedure).
Click to enlarge - Power readouts let you calculate efficiency (left) and the oscilloscope (right) has multiple uses
A current probe placed around the live brown wire of the power input cable measures total harmonic distortion on the Tektronix DPO 3034 Digital Phosphor Oscilloscope, which can output screenshots to a connected memory stick. The oscilloscope also receives inputs direct from the 3.3V, 5V and 12V rails via the custom PCB, which allows you to check the ripple on each of them. Finally, the oscilloscope can be used to ascertain a PSU's hold-up time (how long a PSU will supply power for in the event of power loss – this must be at least 17ms) and inrush current (the high burst of current drawn right as the PSU is switched on and the input capacitors are charged).
Click to enlarge - The current probe
The PSU we tested with Cooler Master was one of its G750M units, which is rated for 750W of power and has an 80 Plus Bronze certification. All in all, the results were excellent. Voltage on the 12V line range between just 11.91V and 12.08V, with all other rails safely within range as well. Efficiency for 230V input was measured at 85.6 percent at full load, 89.5 percent at half load, and 88.9 percent at 20 percent load, as well as 83 percent, 87.5 percent and 87.3 percent at the same load levels respectively for 115V input. These results confirm the G750M's 80 Plus Bronze rating.
Click to enlarge - Ripple on the G750M
We were also impressed by the ripple results. Despite not being an enthusiast PSU designed for overclocking, the all important 12V rail had just 21.1mV of ripple at full load, whch is very low. The Intel ATX specifications permits up to 120mV of ripple here, and up to 50mV on the 3.3V and 5V rails, both of which also passed safely. We asked if Cooler Master had its own internal ripple targets lower than what the ATX specification defines, but we were only told that they change based on the model and on what the competition is offering.

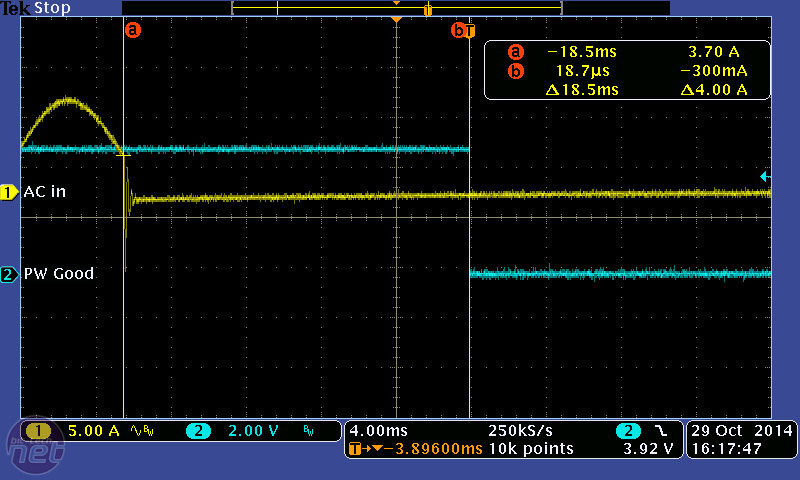
Click to enlarge - Inrush current and hold-up time on the G750M
With the main electrical results obtained, it's also important to test out the various safety features of a PSU, such as over voltage protection, short circuit protection, over current protection and so on. Some of these can be triggered manually (e.g. short circuits) and some will need the Chroma load generators which you can use to overload the rails. For each PSU, it typically takes between two and two and a half hours to run all the required tests.
Thanks go out to Cooler Master and especially René for taking the time to take us through the PSU design and testing procedures. This also concludes our coverage from our tour of the Cooler Master HQ – thanks to all who made it possible!


MSI MPG Velox 100R Chassis Review
October 14 2021 | 15:04

Want to comment? Please log in.