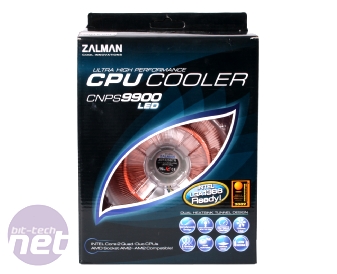
Zalman CNPS 9900
Manufacturer: ZalmanUK Price (as reviewed): £55.99 (inc. VAT)
US Price (as reviewed): $74.99 (ex. Tax)
Weight: 730g
Size (with fan): 94mm (L) x 131mm (W) x 152mm (H)
Fan Speed: 1,000 - 2,000 RPM
Stated Noise Level: 19.5dB(A) - 38.0dB(A)
Warranty: One Year Standard Warranty
Supported Sockets: Intel LGA 1366 LGA775, AMD 754, 939, 940, AM2,
Zalman has long been a feature on the PC cooling landscape and has produced plenty of memorable coolers over the last few years using its “flower” technique of splaying the cooling fins out from the CPU in a ring rather than stacking them in towers as many other coolers do.
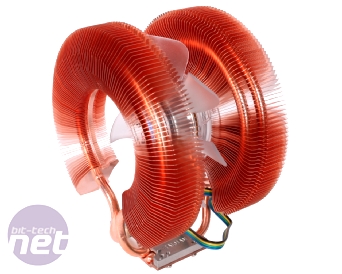
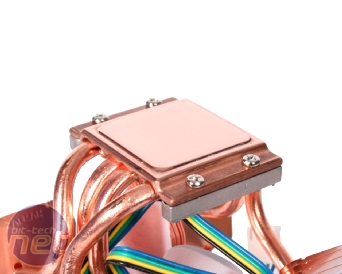
The Zalman 9900 is no different, and picks up where the Zalman CNPS 9700 left off with the same style of splaying the heatsink’s cooling fans out in a ring, supported by a heat-pipe that runs through the centre of them. The difference this time though is that there are now two separate arrays of cooling fins arranged in the unique “flower” fashion, with a single bi-directional copper heat-pipe running through the front ring and two bi-directional copper heat pipes running through the rear ring, with each pipe beginning and terminating in the cooler’s copper base.
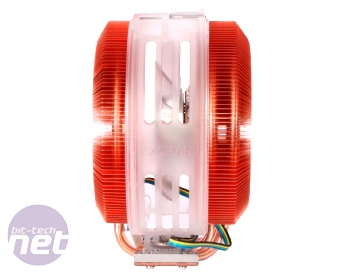
Sandwiched between the two rings of copper cooling fins lies a blue-LED lit 120mm cooling fan mounted into the centre of the rear cooling fin ring, and just as with the Cooler Master V8, the 9900’s design is able to take advantage of both the intake and exhaust airflow of the fan to disperse heat from its cooling fins.
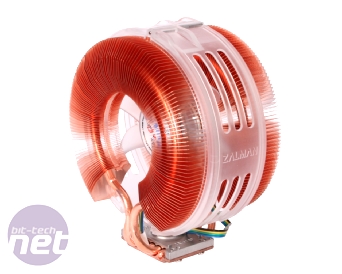
Keeping the two rings of cooling fins apart (as well as stopping stray wires falling into and jamming the fan’s blades) is a well made ventilated shroud allowing air to flow into the middle of cooler while also creating a tunnel effect for the air pulled in, directing it back over the rear cooling fins. Bizarrely though Zalman is advising the removal of the shroud from the cooler to get the best results – something that it makes no point of mentioning in the installation instructions, so we’ll be testing the cooler both without and without the plastic collar.
Shroud or not, the120mm fan spins at a standard speed of 2,100 RPM and the turbulence generated from dragging air over and then blowing it back against so many cooling fins only adds to what is an unacceptably noisy cooler at full speed. It’s even louder than the Asus Triton at full speed (just) and is very intrusive. While we appreciate that manufacturers plan on users to take advantage of the 4-pin PWM connector and use motherboard control software to manage a cooler's fan speed, for the most part motherboard based automatic fan controls are very poor, so we test them at full speed as they would run installed and fitted to any 3-pin or 4-pin header.
What’s bizarre here though is the omission of one of Zalman’s excellent fan-mate fan controllers, which have been included with CNPS 9700s for the last few years. If one had been bundled with the 9900 it would have gone a long way towards rectifying the noise problem, allowing owners to set their own compromise between cooling and performance rather than having to rely on hit and miss motherboard fan controls.
The fact a fan-mate has been left out is even more galling when you look at the Zalman 9900’s price tag of £55.99. We know this is supposed to be premium cooler for the latest premium CPUs, but with none of the extras you get with older model Zalman coolers, and running very noisy to boot, the Zalman 9900 doesn’t look like very good value. Let’s just hope it’s able to redeem itself in our thermal testing.
So How is it to Mount?
Awkward. Like many of the larger coolers we’re looking at today, the 9900 uses a back plate mounting system requiring the full removal of your motherboard (unless your chassis has a handily cut hole like the recent batch from Cooler Master). However, the large dimensions of the 9900 mean that the standard LGA 1366 mounting holes still aren’t big enough, so you’ll first need to mount an adapter bracket to the board first, requiring you to screw up from the backside of the board.Fitting the adapter bracket is only half the battle though, as you’ll still need to angle the cooler into its retention bracket and then screw it into place using the sprung screws on each corner, an awkward process in which the cooler can easily shift out of position resulting in an uneven and potentially damagingly tight fitting. Once properly secured though, the mounting is very solid and secure, but just as with the V8, it shouldn’t have to be so difficult to fit.

MSI MPG Velox 100R Chassis Review
October 14 2021 | 15:04




Want to comment? Please log in.