
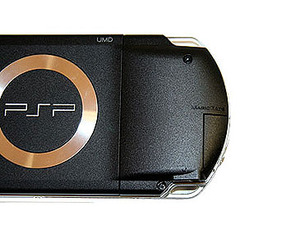
Armed with a very small Philips screwdriver I set about taking my PSP apart. There are two screws at the rear where the Memory Stick card is located, these both need to be removed.
Then there is a small silver screw on the underside of the unit right in the centre. The other two screws are a bit more tricky to find as they’re located in the battery compartment.
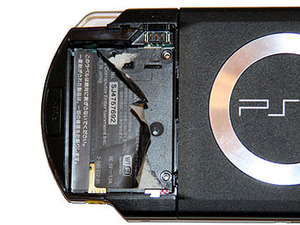
You need to remove the battery cover and the battery, then go about peeling back the sticker which hides the screws. There are two silver screws that run parallel down one side of the compartment, these do not need to be removed – I figured this out the hard way.
The two screws you do need to remove are black – one is hidden under the main, large sticker, while the other is under the smaller slim sticker as shown in the illustration.
 See the two screw holes on the right of the battery compartment? You don't need to remove the screws that go there! On the right of the machine, these two screws need to be removed, as well as the silver one on the underside between the headphone jack and power socket.
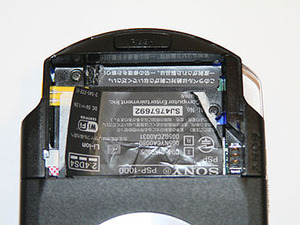 Those two screws, on the other hand, do need to come out.
Once all the screws were removed I was able to just pull the face plate away from the main unit. All the buttons and controllers stayed intact in the face plate, so I put the main unit somewhere safe so as not to damage the now unprotected screen. The (broken) analogue stick was secured with two silver screws. Removing these screws released the stick, but I had to reuse the washer, so I grabbed that before throwing the old stick away. After sliding the washer over the new stick I screwed it into place on the new face plate – job done!
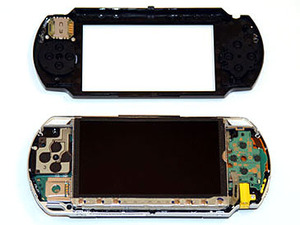
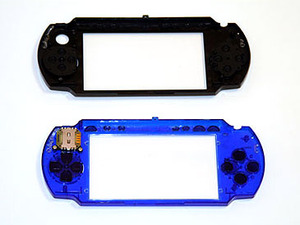 Once the face plate is off, make sure you keep the main PSP unit safe, especially the screen. Next I had to install all the new buttons into the blue face plate. PSP Tree sent me D-Pad buttons, Triangle, Square, Circle and X buttons, as well as the row of buttons that runs under the screen. I had to remove the rubber backing from both the D-Pad and action buttons from the old black face plate and install them on the new one. This keeps all the buttons in place while you're attaching the new face plate to the PSP.
Then there is a small silver screw on the underside of the unit right in the centre. The other two screws are a bit more tricky to find as they’re located in the battery compartment.
You need to remove the battery cover and the battery, then go about peeling back the sticker which hides the screws. There are two silver screws that run parallel down one side of the compartment, these do not need to be removed – I figured this out the hard way.
The two screws you do need to remove are black – one is hidden under the main, large sticker, while the other is under the smaller slim sticker as shown in the illustration.
Once all the screws were removed I was able to just pull the face plate away from the main unit. All the buttons and controllers stayed intact in the face plate, so I put the main unit somewhere safe so as not to damage the now unprotected screen. The (broken) analogue stick was secured with two silver screws. Removing these screws released the stick, but I had to reuse the washer, so I grabbed that before throwing the old stick away. After sliding the washer over the new stick I screwed it into place on the new face plate – job done!
RELATED ARTICLES


MSI MPG Velox 100R Chassis Review
October 14 2021 | 15:04

Want to comment? Please log in.