Mounting the Radiator and Fan
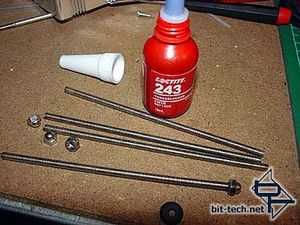
4mm Threaded rod was cut roughly to length (after test fitting) and dome nuts added to one end and secured with Loctite before being fitted through the fan holes.
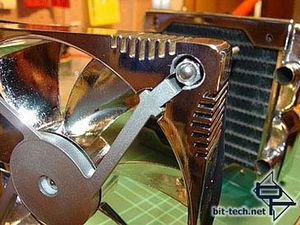
You can see how the nut sits recessed in the drilled hole. I also added a rubber washer for a bit of secure-anti-vibration overkill.
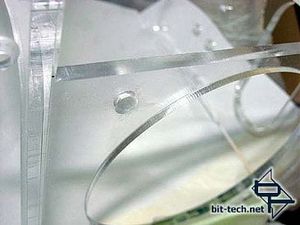
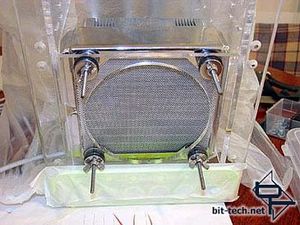
The pre-drilled holes in the C³ case needed enlarging with a needle file to allow the rod to fit and line up correctly and the whole assembly fitted in place without too much trouble.
Note: In the left-hand picture above there is a small black mark at the bottom left corner of the drive opening - this marks where I had to file about 5mm off the bottom of the drive opening as my drives wouldn\'t all fit in properly otherwise. Another obstacle to have had to find a solution for!
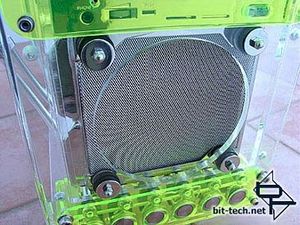
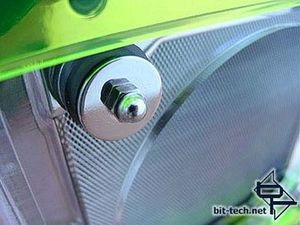
The Rad assembly was attached using dome nuts and polished stainless steel washers.
You\'re probably noticing the black feet between the radiator and the case front? These are actually made up of (in order from rad to case) Stainless washers x 2, Nyloc nut and thick rubber washer. The thick (6mm or so) rubber washers fit over the Nyloc nut and are yet another thing salvaged from my shower hose handles! They provide vibration dampening and guard against cracking the case through over tightening the nuts holding the whole thing together. If you don\'t know what nyloc nuts are, they are those nuts with the nylon plastic insert inside them that make them lock once you have done them up - great in situations where you want to guard against nuts loosening due to vibration etc.
Now, how to stop people poking sticky fingers into the Rad...
Front Grille
To guard against said sticky fingers, a grille was called for. One prerequisite I set was that the grille had to be easily removable by itself without having to fiddle with any other part of the case. This is to allow cleaning the dust off the mesh screen behind it. I also wanted a clear acrylic grille to balance the use of all that green plexi on the front panel and draw the eye to the intake over the Radiator.
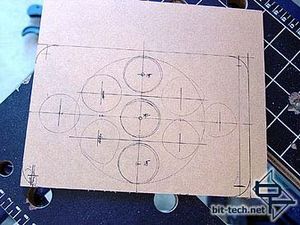
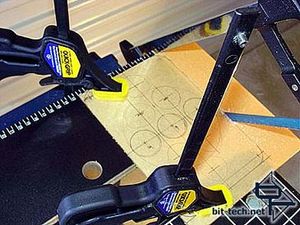
An offcut piece of 3mm clear plexi was measured and marked for cutting/drilling. It was clamped to my workmate bench and cut out with a hacksaw.
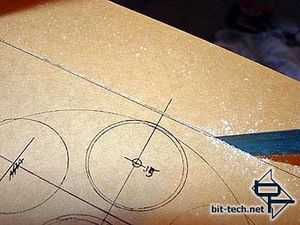
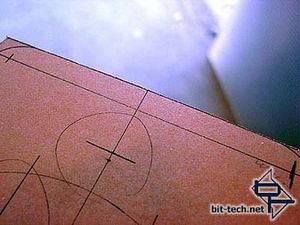
I mention a lot about using the hacksaw to cut plexi. Well you can see just how accurately you can cut with it from the pictures above. I was getting within 1mm of the line all the way along a cut. This meant minimal filing required and a happy G-gnome! They key is to go slowly and carefully and use a light pressure with a sharp, good quality blade.
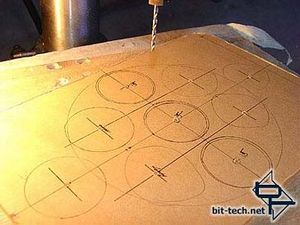
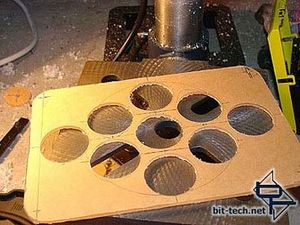
I used a 33mm holesaw in my drill press to make the holes. I went for a simple pattern, though the jury is still out on the design. I may go and make another when the case is finished.
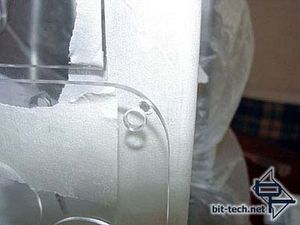
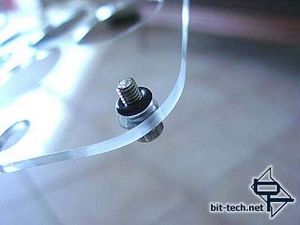
Holes were marked and drilled in the front bezel and rubber o-rings added to make the sit flat along its length as it sits on top of the stainless steel washers attaching the fan (all in the interest of separate removal). The mounting holes in the bezel were drilled out wider at the back to recess the 4mm nuts so the bezel would attach properly. I also chamfered all the mounting holes (also throughout the case) to guard against cracking - plexi is most vulnerable to cracking at sharp right-angled edges and rounding or chamfering these strengthens them.
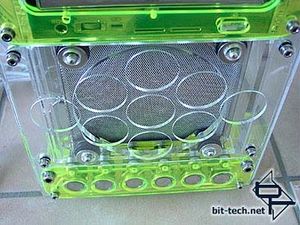
The finished grille in place.

4mm Threaded rod was cut roughly to length (after test fitting) and dome nuts added to one end and secured with Loctite before being fitted through the fan holes.

You can see how the nut sits recessed in the drilled hole. I also added a rubber washer for a bit of secure-anti-vibration overkill.


The pre-drilled holes in the C³ case needed enlarging with a needle file to allow the rod to fit and line up correctly and the whole assembly fitted in place without too much trouble.
Note: In the left-hand picture above there is a small black mark at the bottom left corner of the drive opening - this marks where I had to file about 5mm off the bottom of the drive opening as my drives wouldn\'t all fit in properly otherwise. Another obstacle to have had to find a solution for!


The Rad assembly was attached using dome nuts and polished stainless steel washers.
You\'re probably noticing the black feet between the radiator and the case front? These are actually made up of (in order from rad to case) Stainless washers x 2, Nyloc nut and thick rubber washer. The thick (6mm or so) rubber washers fit over the Nyloc nut and are yet another thing salvaged from my shower hose handles! They provide vibration dampening and guard against cracking the case through over tightening the nuts holding the whole thing together. If you don\'t know what nyloc nuts are, they are those nuts with the nylon plastic insert inside them that make them lock once you have done them up - great in situations where you want to guard against nuts loosening due to vibration etc.
Now, how to stop people poking sticky fingers into the Rad...
Front Grille
To guard against said sticky fingers, a grille was called for. One prerequisite I set was that the grille had to be easily removable by itself without having to fiddle with any other part of the case. This is to allow cleaning the dust off the mesh screen behind it. I also wanted a clear acrylic grille to balance the use of all that green plexi on the front panel and draw the eye to the intake over the Radiator.


An offcut piece of 3mm clear plexi was measured and marked for cutting/drilling. It was clamped to my workmate bench and cut out with a hacksaw.


I mention a lot about using the hacksaw to cut plexi. Well you can see just how accurately you can cut with it from the pictures above. I was getting within 1mm of the line all the way along a cut. This meant minimal filing required and a happy G-gnome! They key is to go slowly and carefully and use a light pressure with a sharp, good quality blade.


I used a 33mm holesaw in my drill press to make the holes. I went for a simple pattern, though the jury is still out on the design. I may go and make another when the case is finished.


Holes were marked and drilled in the front bezel and rubber o-rings added to make the sit flat along its length as it sits on top of the stainless steel washers attaching the fan (all in the interest of separate removal). The mounting holes in the bezel were drilled out wider at the back to recess the 4mm nuts so the bezel would attach properly. I also chamfered all the mounting holes (also throughout the case) to guard against cracking - plexi is most vulnerable to cracking at sharp right-angled edges and rounding or chamfering these strengthens them.

The finished grille in place.

MSI MPG Velox 100R Chassis Review
October 14 2021 | 15:04


Want to comment? Please log in.