Introduction by macroman
There are many modded cases which had had simple LCD or VFD displays fitted to add an element of "coolness". These displays are generally somewhat limited in their capabilities and often consist of just a few lines of alphanumeric characters. Now you can go that extra mile and take "coolness" into the "chilly" realms by fitting a "real" graphic LCD display just like the one on your desktop, only smaller. I am talking about the add-on LCD screen for the Sony PSone Playstation games console. This display has a viewable area of approximately 5 inches, has a resolution of 640 x 480 and is a gift to modders everywhere. Here are a few features of this unit...
Now illustrious bit-techer Brian Walker aka bEE2643 is about to show you how it is done. Over to you Brian...
Give the people pictures!
OK, to start, here are a list of the tools you'll need: PSONE LCD (I used an NTSC one, you people in the UK may get PAL ones if ordered locally) Soldering iron & solder, patience, and about 4 hours of your precious time (not including how long it takes for you to read this) Flat head jewellers screw driver Philips jewellers screw driver
My PSONE LCD arrived it its retail packaging, including the unit itself, a bunch of warranty certification (voided 20 minutes later), and the power adapter (don't throw it out, you'll need it for the way this mod done is done.)

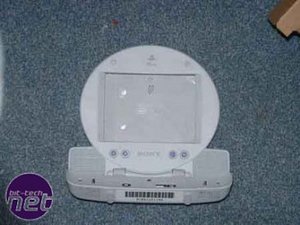
Meet the PSONE LCD, you have 2 options to wire this LCD, through composite (RCA) which is a significant drop in quality from the second choice, VGA, which is the method of choice for this article.

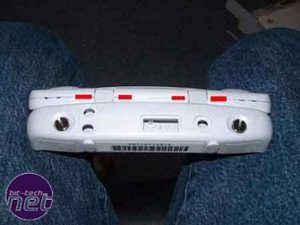
Firstly, remove the three screws and the plate on the bottom front of the unit. If you want to keep the casing in good condition then refer to the red highlighted areas in the graphic below to see where to insert your flat head screw driver to pry open the casing without damaging it.
NOTE: bend the casing to the position shown below as it will aid in opening the device. There are another two screws hidden underneath rubber bumpers on the face of the LCD at the top (not shown)

This is where things get a bit tricky, you have 2 options here because the speaker connectors are glued in place into the circuit, and trying to remove it will either damage the controller or rip the wires out, so you can either cut the wires or manoeuvre the casing so you can unscrew the bottom half to get it out of the way.

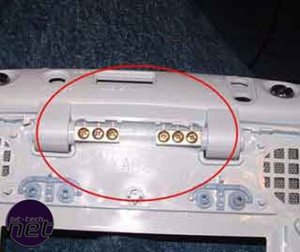
Keep the circuit from the lower half, disconnect it from the psone for the time being, you will need it later on. Now there are five screws which need to be removed to take the controller off, one on each corner and the middle of the bottom, don't forget to remove the ribbon cable from the connector (only one on the circuit) by pulling up on the little brown retainer (careful, it's fragile!), as well as the connector at the top for the CCFL light, then remove the controller.
Now you can take the bare LCD and mount it in the deired position. I mounted mine in the three 3.5" drive bays that are on the front of my Lian-Li PC6070 with double edged sticky tape. This image shows the controller mounted behind it, so imagine it's not there at the moment >_<.

There are many modded cases which had had simple LCD or VFD displays fitted to add an element of "coolness". These displays are generally somewhat limited in their capabilities and often consist of just a few lines of alphanumeric characters. Now you can go that extra mile and take "coolness" into the "chilly" realms by fitting a "real" graphic LCD display just like the one on your desktop, only smaller. I am talking about the add-on LCD screen for the Sony PSone Playstation games console. This display has a viewable area of approximately 5 inches, has a resolution of 640 x 480 and is a gift to modders everywhere. Here are a few features of this unit...
- Designed specifically for Playstation One by Sony Computer Entertainment but who cares?
- 5 inch LCD colour TFT screen
- Twin stereo speakers
- Brightness and volume controls
- AV IN jack, headphones jack
- AV MULTI OUT connector
Now illustrious bit-techer Brian Walker aka bEE2643 is about to show you how it is done. Over to you Brian...
Give the people pictures!
OK, to start, here are a list of the tools you'll need: PSONE LCD (I used an NTSC one, you people in the UK may get PAL ones if ordered locally) Soldering iron & solder, patience, and about 4 hours of your precious time (not including how long it takes for you to read this) Flat head jewellers screw driver Philips jewellers screw driver
My PSONE LCD arrived it its retail packaging, including the unit itself, a bunch of warranty certification (voided 20 minutes later), and the power adapter (don't throw it out, you'll need it for the way this mod done is done.)

Meet the PSONE LCD, you have 2 options to wire this LCD, through composite (RCA) which is a significant drop in quality from the second choice, VGA, which is the method of choice for this article.

Firstly, remove the three screws and the plate on the bottom front of the unit. If you want to keep the casing in good condition then refer to the red highlighted areas in the graphic below to see where to insert your flat head screw driver to pry open the casing without damaging it.
NOTE: bend the casing to the position shown below as it will aid in opening the device. There are another two screws hidden underneath rubber bumpers on the face of the LCD at the top (not shown)

This is where things get a bit tricky, you have 2 options here because the speaker connectors are glued in place into the circuit, and trying to remove it will either damage the controller or rip the wires out, so you can either cut the wires or manoeuvre the casing so you can unscrew the bottom half to get it out of the way.

Keep the circuit from the lower half, disconnect it from the psone for the time being, you will need it later on. Now there are five screws which need to be removed to take the controller off, one on each corner and the middle of the bottom, don't forget to remove the ribbon cable from the connector (only one on the circuit) by pulling up on the little brown retainer (careful, it's fragile!), as well as the connector at the top for the CCFL light, then remove the controller.
Now you can take the bare LCD and mount it in the deired position. I mounted mine in the three 3.5" drive bays that are on the front of my Lian-Li PC6070 with double edged sticky tape. This image shows the controller mounted behind it, so imagine it's not there at the moment >_<.


MSI MPG Velox 100R Chassis Review
October 14 2021 | 15:04


Want to comment? Please log in.