Timer Box and Bezel - 2

To attach the bezel to the timer box, I first drilled out the pilot holes to 4mm - and what a joy it was too after days of drilling stainless steel!


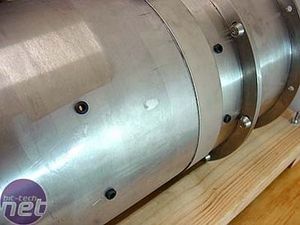
The bezel was then simply slotted onto the open side of the box and long, M4, socket head cap screws were run through and screwed into the threaded holes in the back of the box. A pretty simple setup that will make it easy to open up the timer at any time in the future.


The recessed screw holes and long screws worked well, with the bezel being very securely attached.


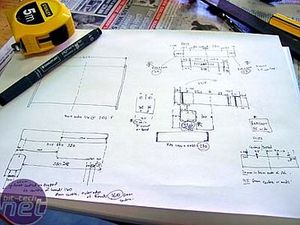
You can see, from the number of measurements I worked out, just how much stock I put on getting everything in the right place. I was even working off manufacturer technical drawings for a couple of parts that I don't have yet, to get the correct measurements to allow room for them when they do arrive. With the holes for the timer box, I inserted small, black rubber grommets into the holes to put tension on the nuts holding the box on, plus they conceal the threads of the screws passing into the case.


As they won't be visible, I used normal stainless M4 hex-head screws to attach the box. The last thing was to attach the bezel. However, I first gave it a polish to the final, 280grit finish that the rest of the case will be in, making sure to run the polishing wheel lengthways down each side so the polish lines look nice. It then received 2 coats of clear acrylic (gloss), allowing a couple of hours between coats. This should prevent the Aluminium oxidising and the finish degrading. Unfortunately, lack of time and $$ prevented my preferred option of anodizing.


With the the clearcoat finish, the Aluminium actually came up surprisingly well in comparison to the stainless steel. There is very little difference in colour once polished.


The surface finish and shine matched up pretty well. The recessed socket screws look nice and industrial.

I can't wait to get some plexi and the timer in there!

MSI MPG Velox 100R Chassis Review
October 14 2021 | 15:04


Want to comment? Please log in.