Testing
Here’s how we test cases: we put a system in the case, we run some stress tests to push the temperature up and we listen to how much noise the system makes as we record those figures with a digital temperature probe.We use the same system every time to make sure that our testing is reliable. You can check out the system specs for our test rig below, but remember that the system isn’t supposed to be super-powerful – there are three things we’re looking for, ease of installation, noise and thermal performance. This system is intended to be representative of most modest systems.
CPU: Intel Pentium XE 955 (dual-core, 3.46GHz)
Graphics Card: Sapphire Radeon X1600 XT Ultimate
Motherboard: MSI P6N SLI Platinum
RAM: 2x 512MB Corsair XMS2-667
Hard Drive: 1x 250GB Western Digital WD2500 7,200RPM
Heatsink: Asus Silent Square Pro
Now, admittedly we did have a lot of problems with the system – but few of them were the fault of the system. Instead, it was a problem with our OS installation on the disk and we decided in the end to finally push this puny little test rig up onto Windows Vista since we were fixing it anyway.
Unfortunately, this did create a few problems with our thermal tests. Our methodology for establishing temperatures is to run a test when the system is idle, then again when the CPU and GPU are under duress. To test the CPU we use a bespoke programme which bombards the RAM and CPU with complex algorithms – this worked perfectly under Vista.
The GPU test wasn’t so lucky though and we were unable to get our usual real-time, high-dynamic range lighting test working. In the end we upgraded to 3DMark, using the demo function provided by that to drive the component temperature up. As we said, none of these problems can be blamed on the hardware, but it is important that you understand our testing methodology if you want divide the method from our madness.
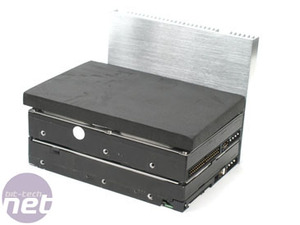
One problem we did have with the case though, which ties into our ease of installation tests, was with the hard drive. There’s only a small gap to put the drive and the sponges in to and the foam is obviously intended to fill as much space as possible. This means you literally have to punch the thing in and, as our frustration mounted, we ended up beating it like a ginger step-child. (that can’t be good for the hard drive – Ed.)
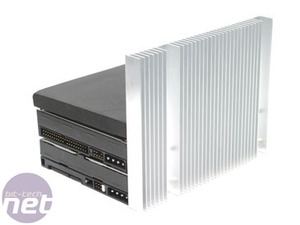
The tight fit prompts yet more problems too – when you want to remove the system you can’t easily reach behind it because of the motherboard and the cramped space, so you may have to actually pull the drive out by yanking on the heatsink which is screwed into the side of it. Not a good idea.
Plus, on top of all that, the Velcro couldn’t be satisfactorily tautened and left precious little room to actually plug the drive in. It was quickly becoming our least favourite HDD cage system ever.
It should also be pointed out the cluster of cables for the front panel of the case – the USB and firewire connectors, etc, - all stem from behind the HDD. In other words, expect your ace cable-manipulating superpowers to be come in to play here or, if you don’t have said massively useful abilities, prepare to bellow in frustration. A lot…
Finally, it’s worth mentioning that the PSU for the Silentium T2 has only a four-pin 12V CPU connector, where most modern motherboards will use eight-pin 12V connectors instead. The PSU is also lacking in a few of the simpler things which make system installation easy – braided cables, colour-coded connectors or, say, length.

MSI MPG Velox 100R Chassis Review
October 14 2021 | 15:04


Want to comment? Please log in.