SilverStone Temjin TJ11 Interior
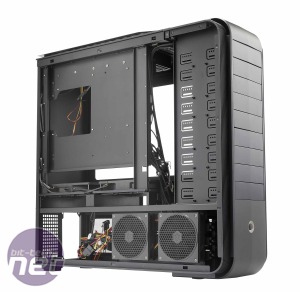
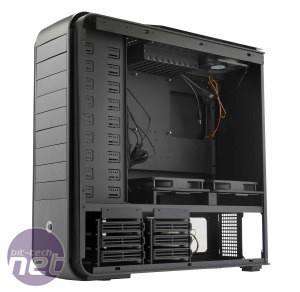
With the motherboard having been rotated through 90 degrees, the interior of the TJ11 is drastically different in some areas to that of the TJ07. However, it still has its 3.5in drive bays located in the lower chamber, courtesy of two hot-swappable drive cages, each with space for three hard disks.However, the two 180mm Air Penetrator fans provide a powerful punch in the air cooling department - something that was lacking with the TJ07. To be fair to the TJ07, though, you'll almost certainly be buying it and the TJ11 with water-cooling in mind. The two Air Penetrator fans are independently controlled using fan controllers at the rear of the roof, while a fan splitter cable is provided to allow one 4-pin Molex connector to power the three remaining 120mm fans.
Due to the orientation of the motherboard, you won't be able to squeeze in an EVGA Classified SR-2 - the maximum motherboard width (from the SATA port side to rear I/O) is only 280mm. This is more than enough for ATX motherboards, though, and there are ten expansion slots too. In addition, there is enough room for even a large card such as an AMD Radeon HD 6990 4GB without removing the Air Penetrator fan below it, although both this card and the slightly shorter Nvidia GeForce GTX 590 3GB expel air from both ends, so will be partly working against the Air Penetrator fan. This is far from ideal, but again, it's unlikely that the graphics card will be air-cooled in this case.
Click to enlarge
Interestingly, there are no rivets used in any of the key areas of the TJ11's construction. This is one reason for the high cost of the case, but it opens up a whole new dimension as far as modding is concerned. There's no need to drill out the rivets to dismantle the case for painting or powder-coating, and the potential for modifying the various panels inside is quite considerable and relatively easy.
As far as water-cooling hardware is concerned, the TJ11 doesn't disappoint. The two drive cages in the bottom chamber can be removed, although this proved to be quite tricky as the cages need to be partly dismantled before sliding them out. It's far from easy to get them back in place too - if you do plan to remove them, make very sure you won't need to put them back in at some point.
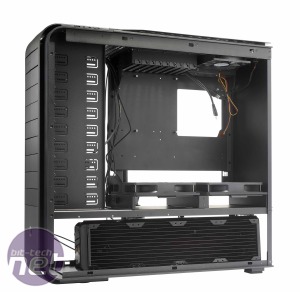
At first we were a little miffed that the TJ11 only had space for a quad 120mm-fan radiator (see below), albeit with several inches to spare. However, on further investigation, there's room for a quad 140mm-fan radiator (note the 140mm measurement there) with little or no modification, which is a major step up for cooling.
Click to enlarge
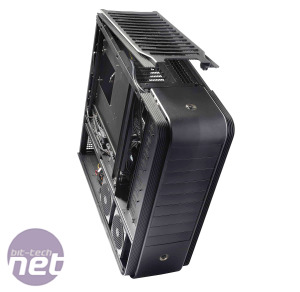
As the I/O panel is at the top of the case, the rear panel of the case is just a large sheet of aluminium that's waiting to be modded to fit another radiator - you'll struggle to fit anything much larger than a single 120mm-fan radiator here, though. The rear of the case is also another possible location for the PSU, letting you clear the entire lower chamber for radiators, pumps and so on. The PSU can be mounted on the right or left of the bottom chamber, but always at the rear of the case.
Installing a system inside the TJ11 is relatively easy. The motherboard tray is removable, as is most of the top section of the case, thanks to the rivet-less construction. The one caveat with such a large case, though, is that cables from your PSU may struggle to reach the motherboard. The 8-pin EPS12V connector of our unit just about reached, but had to be strung across the motherboard. Making this, and other aspects of cable tidying, neater will require the use of extension cables - it's a shame that none were included.
There's plenty of room to hide cables too, especially as the large side panel window only looks over the top chamber. There's little space behind the motherboard tray to route cables, but there are large holes in the mid section for this purpose. The case also includes a PSU jumper, which enables you to use two PSUs simultaneously, with one unit slaved to the other. What's more, an additional backplate for the PSU area is provided to cater for the various mounting options.

MSI MPG Velox 100R Chassis Review
October 14 2021 | 15:04


Want to comment? Please log in.