Manufacturer: Cooler Master
UK price (as reviewed): MSRP £59.99 (inc. VAT)
US price (as reviewed): MSRP TBC
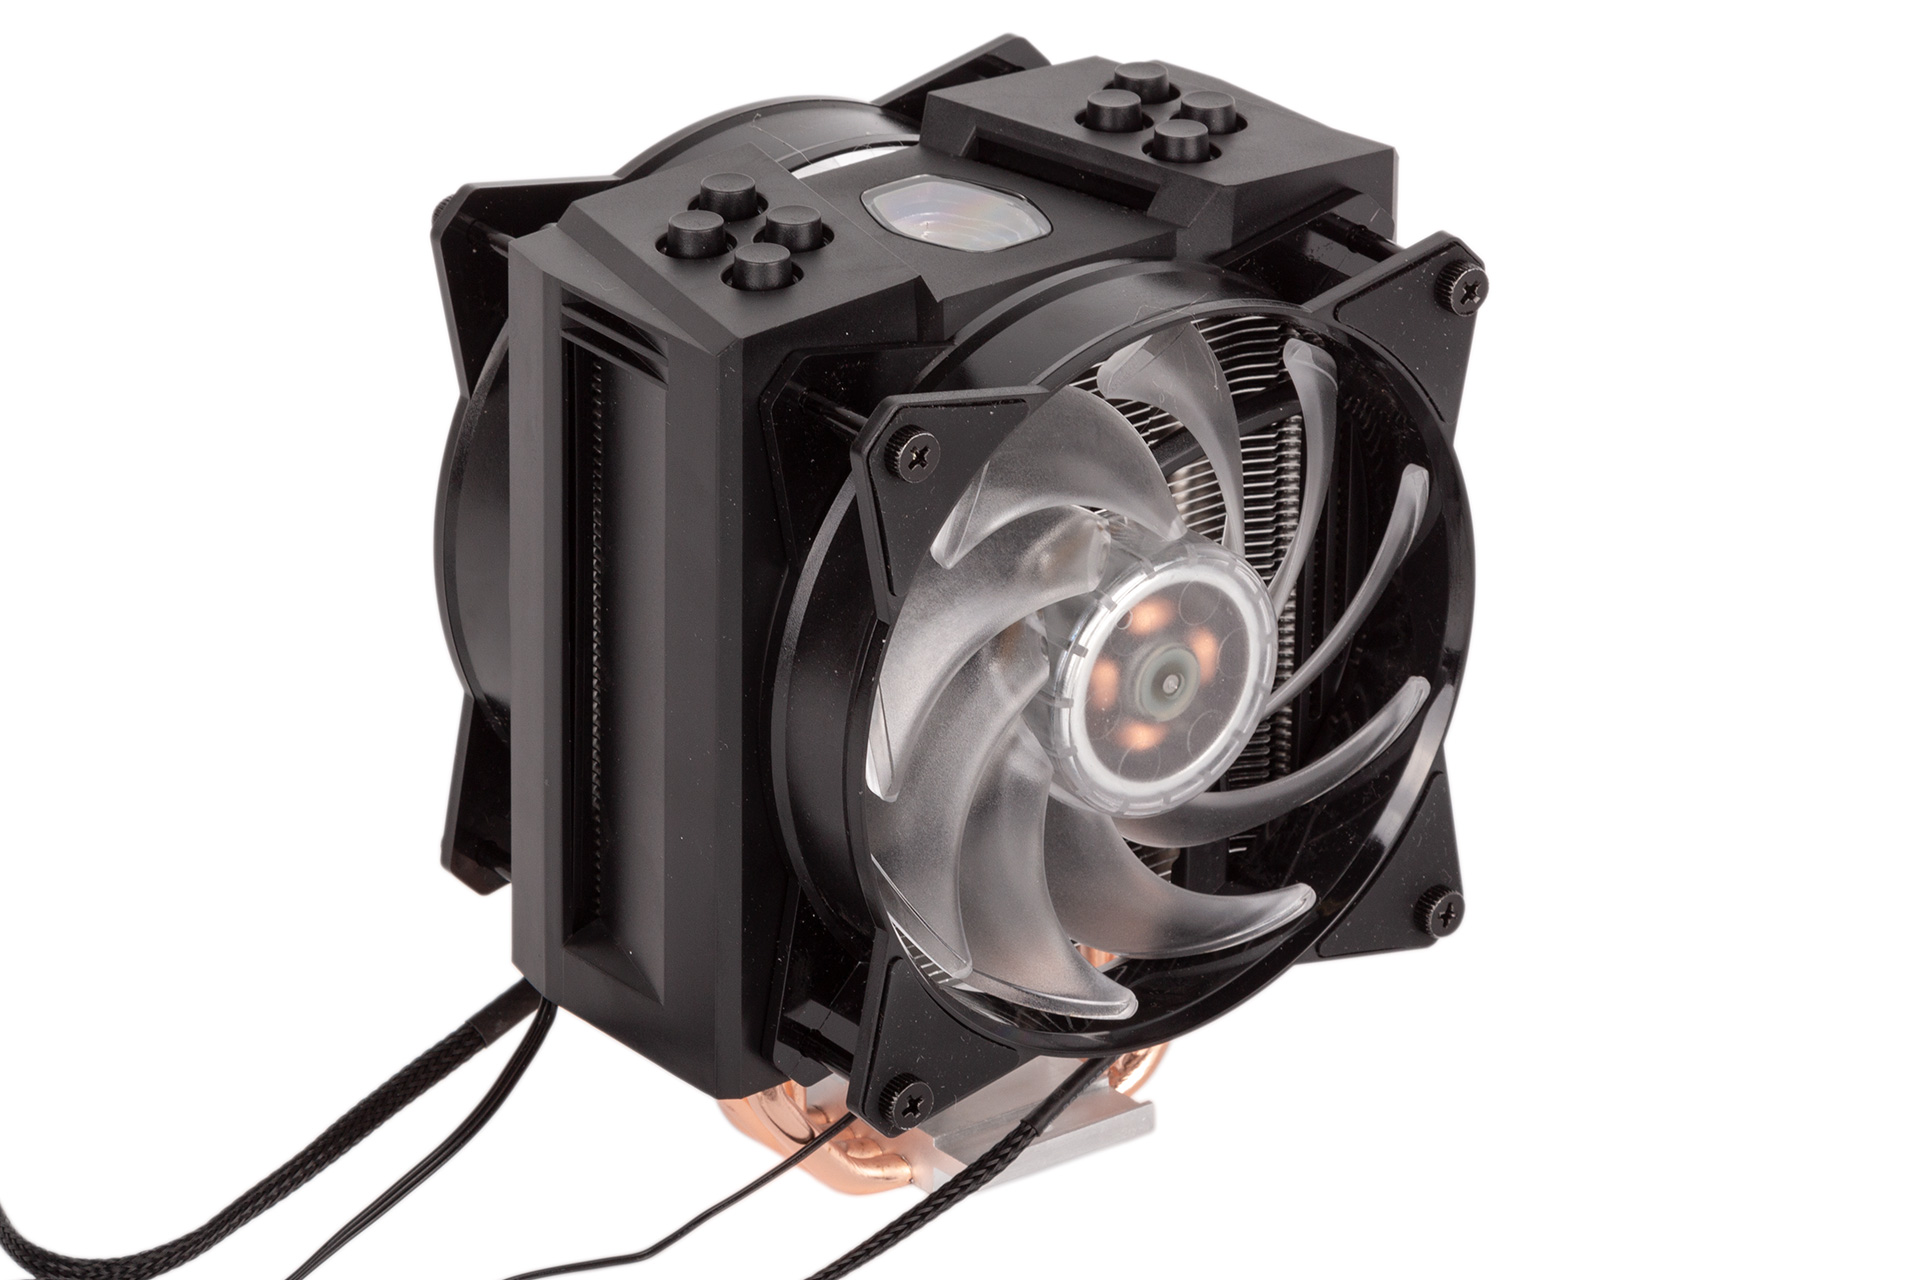
Stretching to 165mm tall, the MA410M may not be compatible with smaller ATX enclosures (a 160mm limit is quite common), so it’s worth checking. Having two fans also adds to the dimensions, but the actual fin stack is only about 60mm deep, so the overall size isn’t too monstrous.
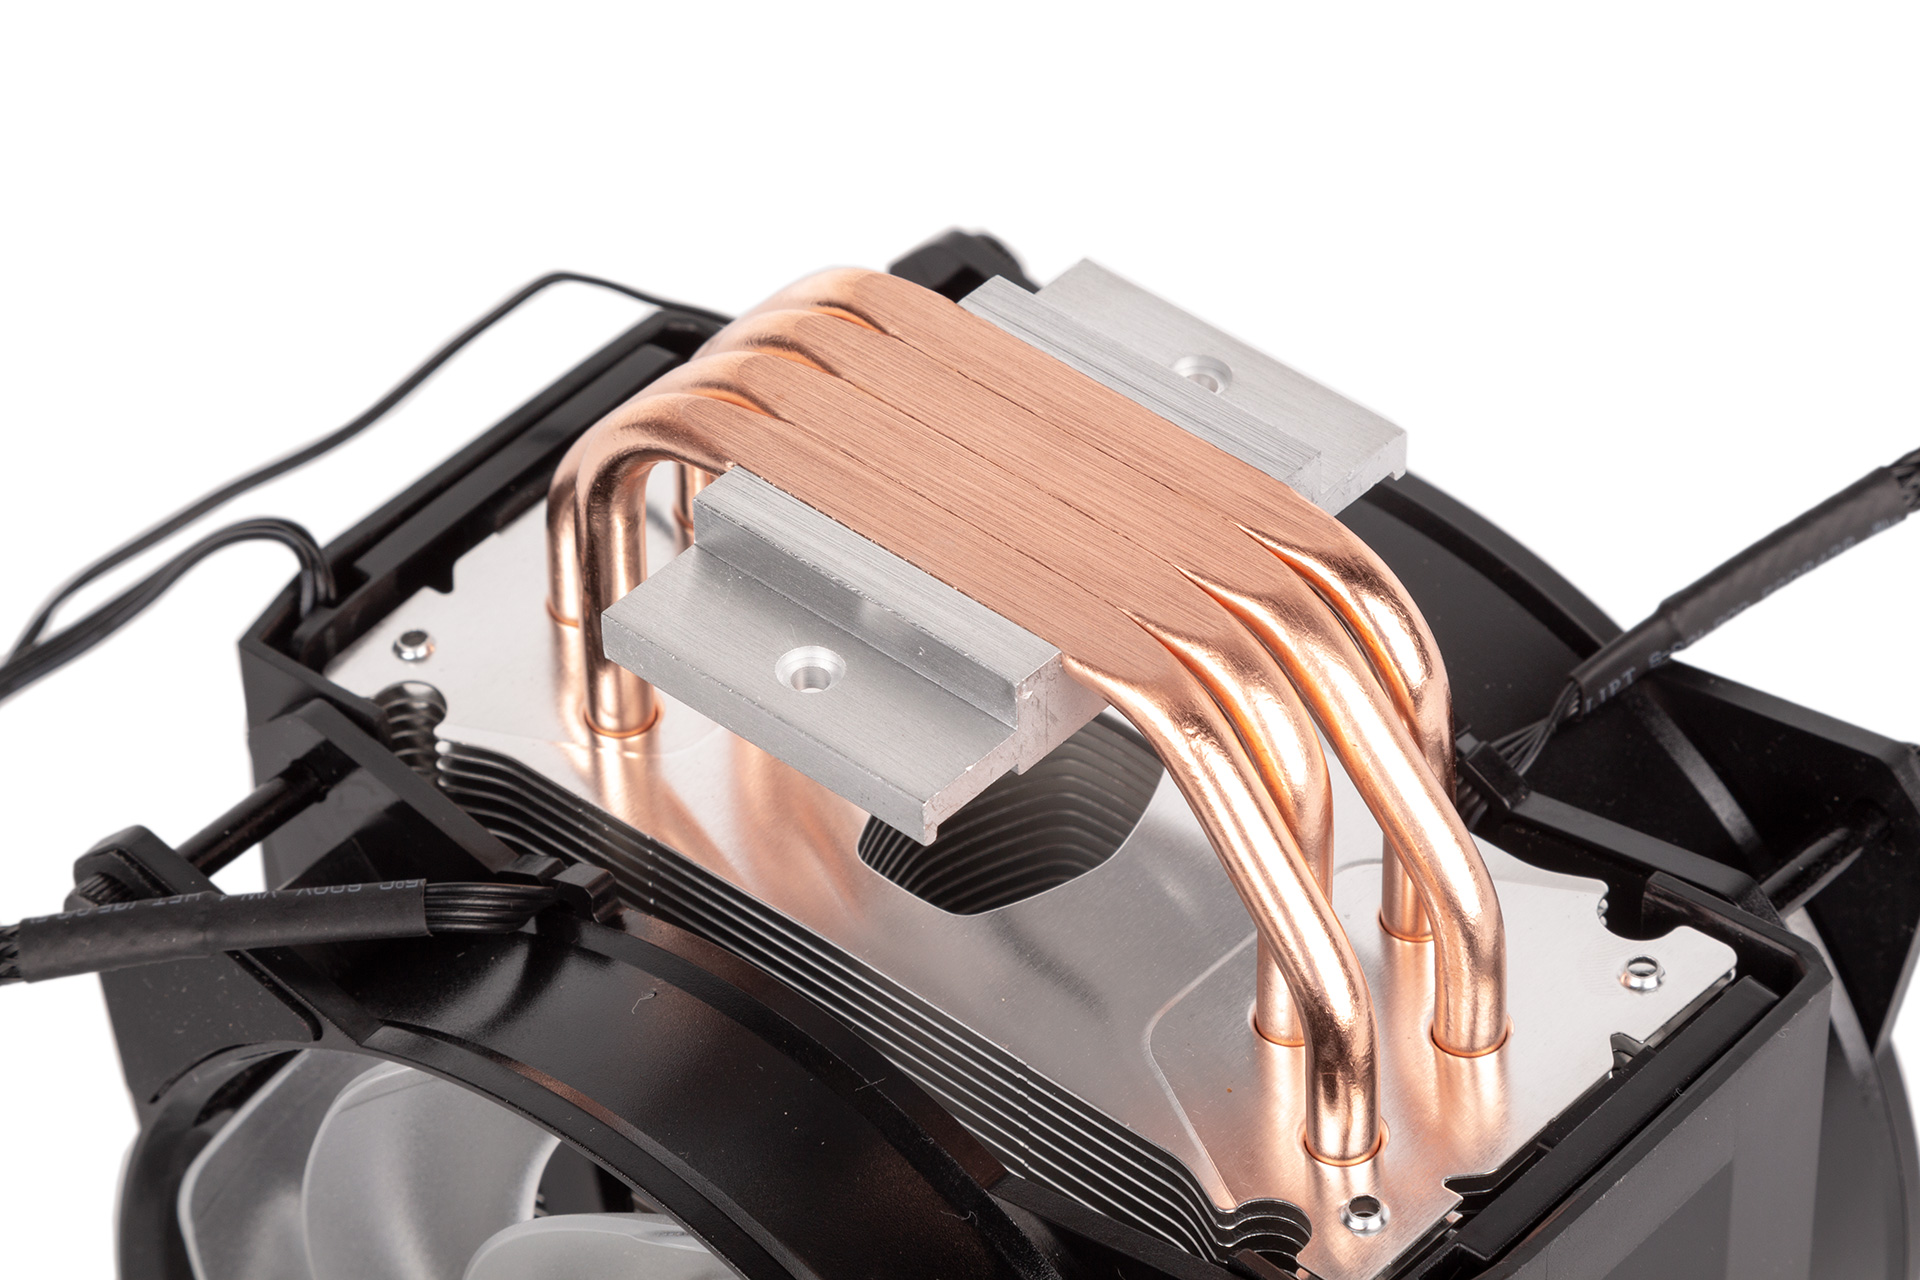
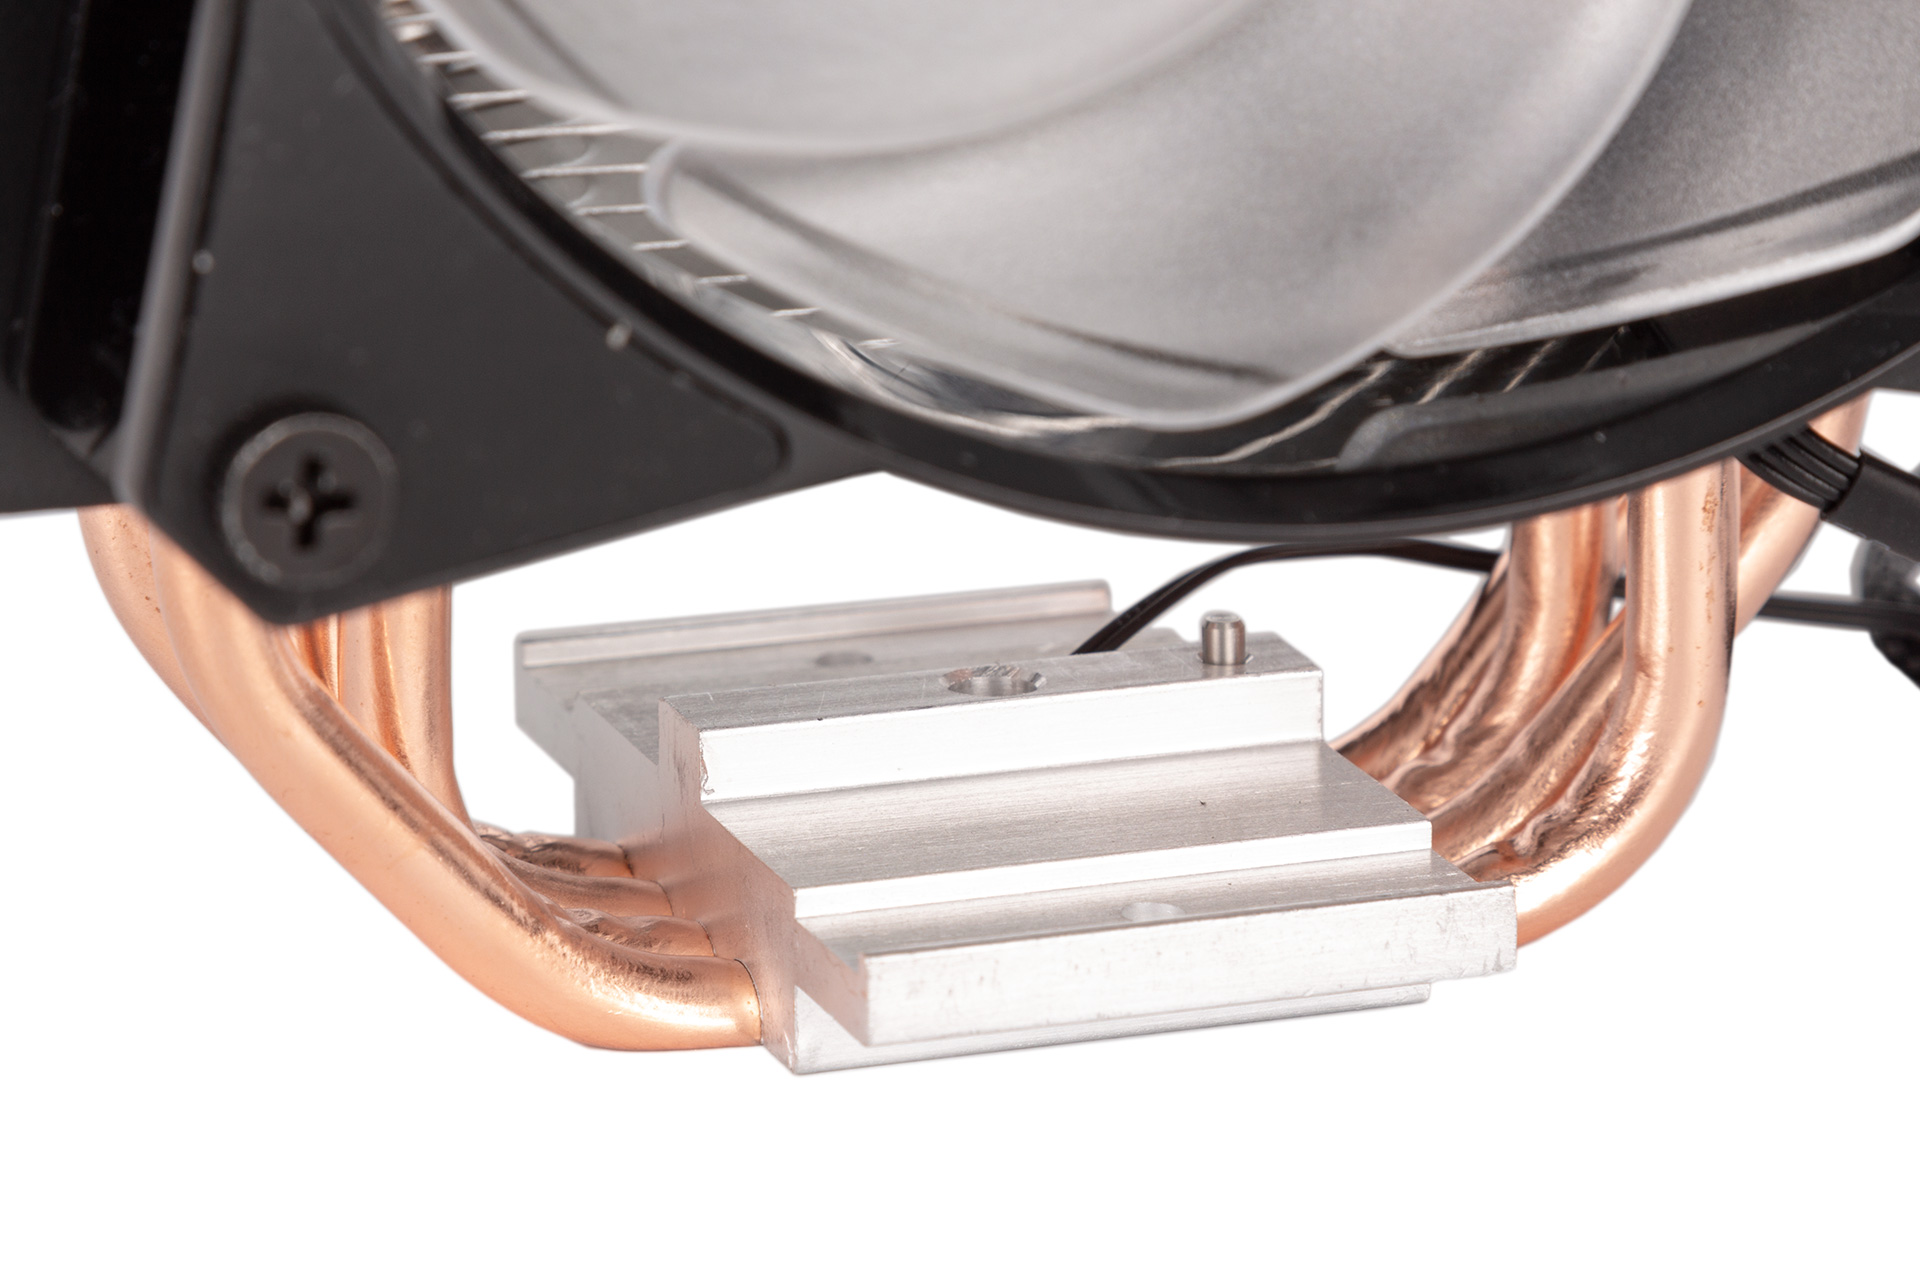
The journey of heat from your CPU begins, of course, at the baseplate, where Cooler Master has installed four 6mm heat pipes. These are flattened and make direct contact with your CPU heat spreader, and there are deliberately no gaps between the heat pipes – this design is referred to as Continuous Direct Contact 2.0 technology by Cooler Master. The copper is left exposed rather than being nickel-plated.
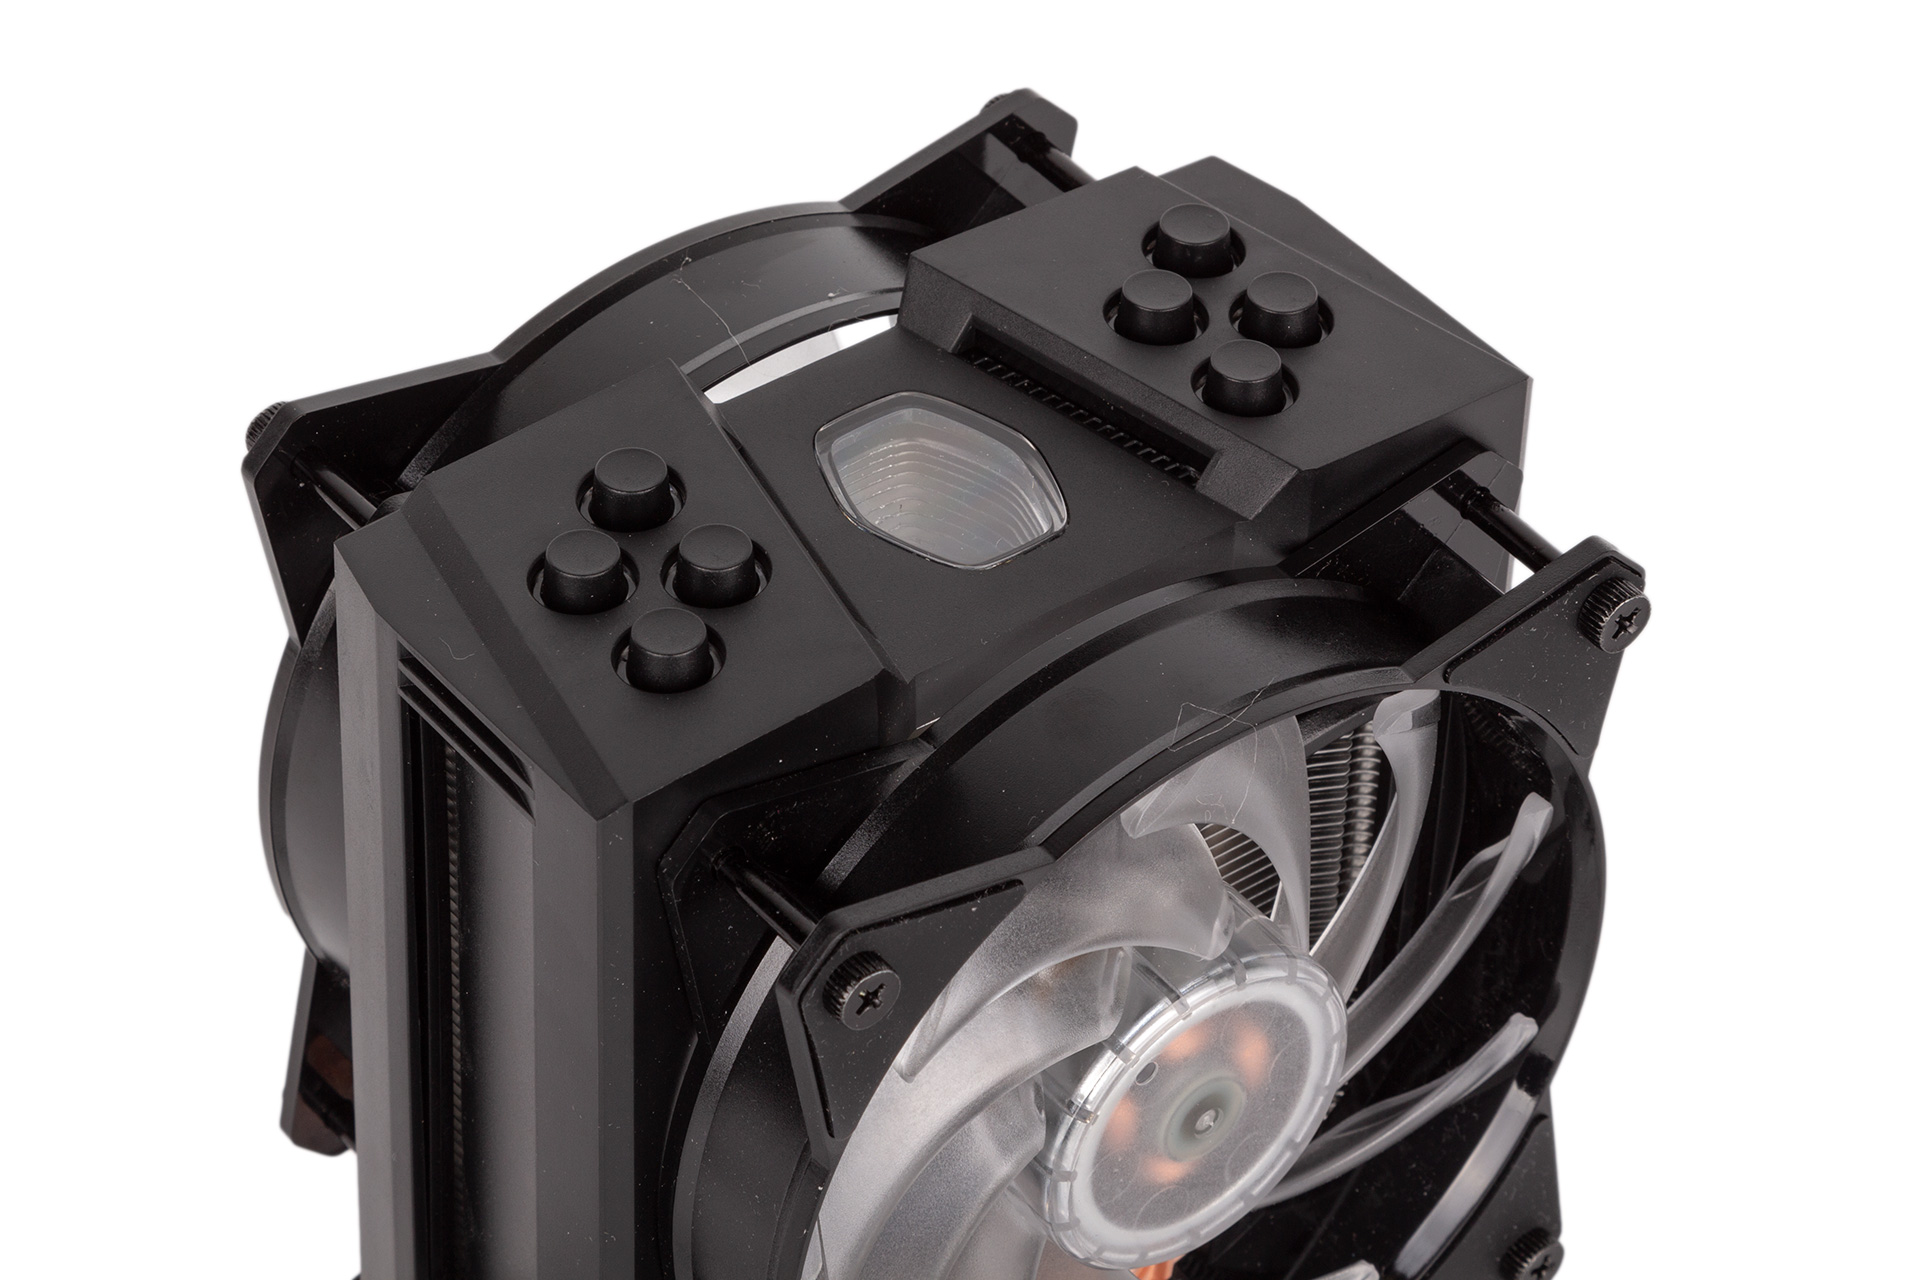
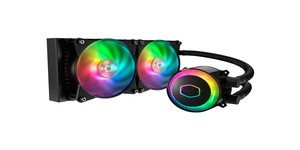
The U-shaped heat pipes travel up into the aluminium fin stack as usual. The fins have cutouts in the middle, creating a tunnel through the stack. The entire stack is also clad in black plastic at the sides and top. This is used to house the LEDs, but it also creates a consistent look since the frames of the fans are the same colour. That said, Cooler Master also shapes the plastic housing to guide airflow through it and out to the sides, something it claims helps to prevent dead spots of heat from forming. This does mean, however, that you need to pay attention to the orientation of the cooler when installing it, which is something that should be made clearer (we have the orientation wrong in our photos relative to the airflow direction...).
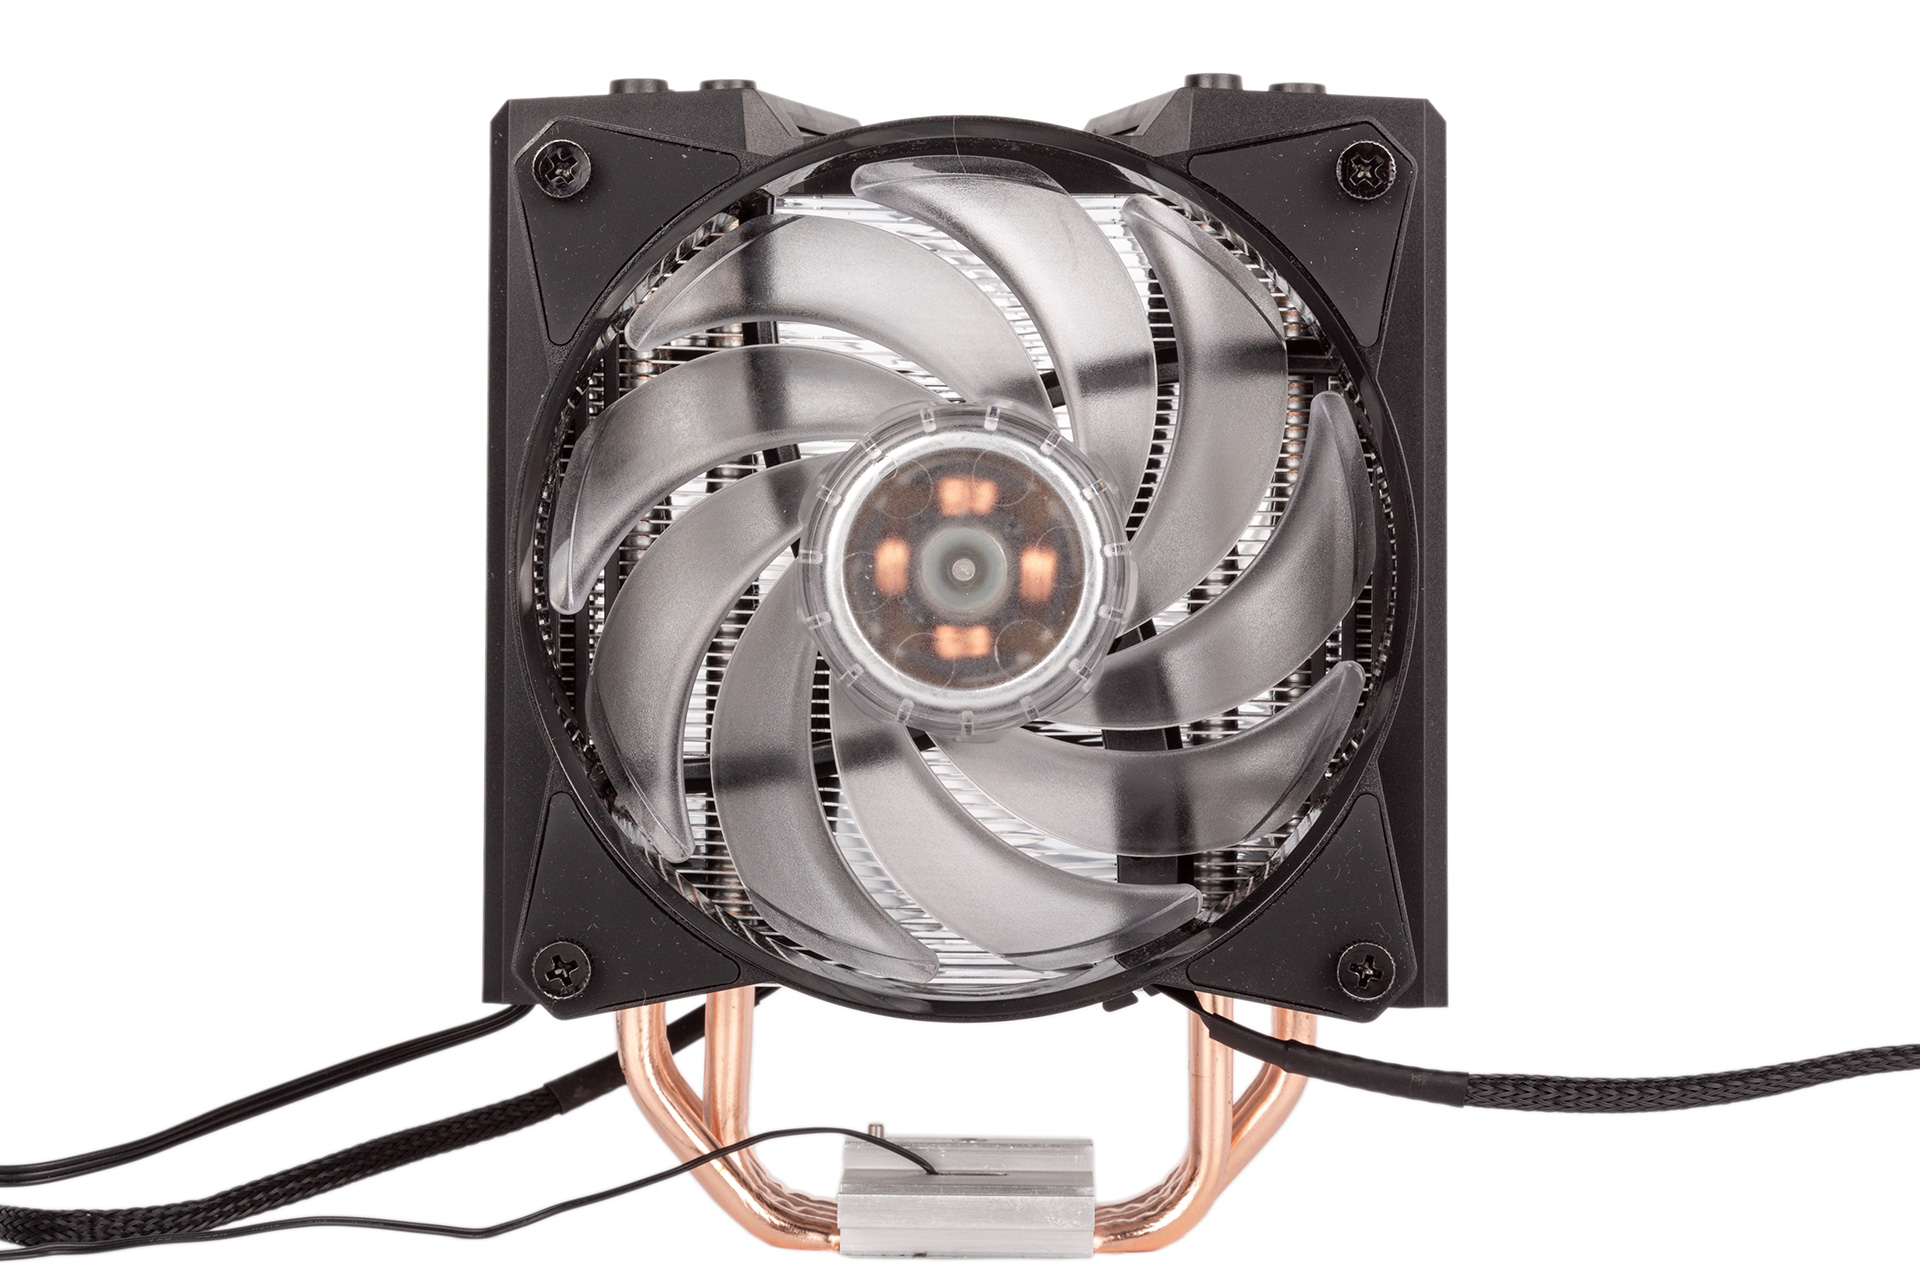
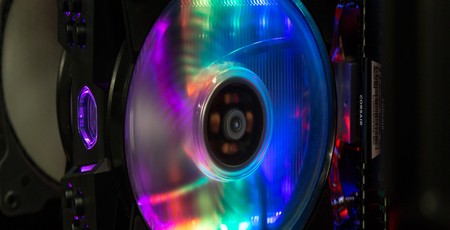
The two fans responsible for shifting heat away from the metal are Cooler Master’s own MF120R Air Balance models. All of this cooler’s LEDs are in the tower, not the fans, but the nine translucent blades will certainly help with dispersing the light. While the front push fan has a normal design, the rear pull fan has a sort of reversed design. Usually, you’d expect the black plastic frame and the wiring to be visible on the side where air comes out of the fan, but Cooler Master has moved this to the front of this fan (i.e. the bit that faces the cooler), leaving the blades exposed at the back with a cleaner look – nice attention to detail. The fans rely on screws rather than fiddly clips, and both have rubberised corners – another bonus – and braided four-pin PWM cables. A splitter cable, also braided, is supplied in case you only have one spare header.
The 28 addressable LEDs are divided into four vertical strips of seven, with two strips on each side. Through the shape of the plastic shell and a ‘light guide device’ under the roof cover, Cooler Master is able to disperse this light rather evenly and brightly through the fan blades and out through the top cover. It also creates a pretty cool warp effect inside the central tunnel. As far as RGB lighting on an air cooler goes, the MA410M is going to be tough to beat.
Installing the cooler involves using the supplied plastic universal backplate for all sockets except LGA 20xx ones – note that AMD’s Socket TR4 is not supported, which is the norm. The mounting screws are secured to the backplate with little plastic clips, allowing you to fasten the backplate in place with double-sided nuts. Once thermal paste is applied – Cooler Master supplies a handy tube applicator with a generous amount of MasterGel Pro – all that’s left is to align and fasten the mounting arms to the nuts. This is made easier by the inclusion of captive, spring-loaded screws, and the mounting arms are also part of a single cross-shaped mechanism that can be set to different positions in order to cater for Intel and AMD users. You’ll need to remove the fans to get proper access to the spring-loaded screws, but overall the installation procedure is pretty painless.

Your work isn’t quite finished yet, however, as you also need to connect the cabling. A single RGB connector caters for all the lighting, but there’s a two-pin cable emerging from the baseplate as well. This is because there’s a thermal sensor embedded within it, which feeds the lighting controller data for its temperature-controlled mode (a basic switch between blue for cool and red for hot). The controller is a basic plastic unit that has a magnet inside, allowing you to stick it on any steel surface, which is useful. It is SATA-powered too (no Molex – yay!), and has buttons to change lighting mode (six available, plus off), change speed, enable the temperature-controlled mode, and to hand over control to motherboards – MSI, ASRock, Asus, and Gigabyte are all supported here. There’s also a micro-USB connection, but no cable is supplied.
Specifications
- Compatibility Intel: LGA 20xx, LGA 115x, LGA 1366; AMD: Socket AM4, Sockets AM3(+)/AM2(+)/FM2(+)/FM1
- Size with fans (mm) 131 x 112 x 165 (W x D x H)
- Fan(s) 2 x MasterFan MF120R 120mm PWM, 650~1,800 RPM
- Fan size (mm) 25 x 25 x 120
- Stated noise 6-31 dB(A) per fan
- Extras Wired RGB controller


MSI MPG Velox 100R Chassis Review
October 14 2021 | 15:04

Want to comment? Please log in.