Board Layout
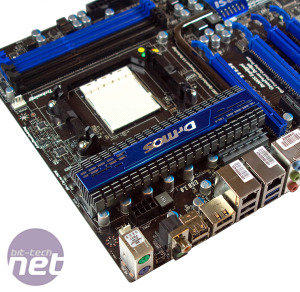
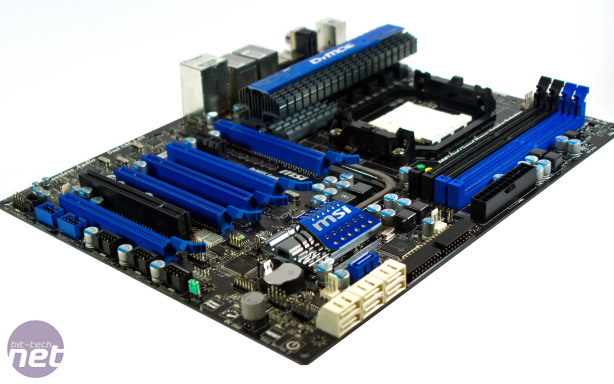
The Socket AM3 CPU socket receives 4+1-phase power from the energy-efficient DrMOS VRMs. There’s a bit of extra power smoothing too, with some low profile, high-capacitance capacitors bolted between the VRMs and the socket. To keep the cost down, these capacitors only feature around the CPU socket, with the rest of the board decked out in more typical ‘long life’ aluminium-capped capacitors and standard MOSFETs. There are two power phases for the DDR3 memory and two more for the SB850 Southbridge, for example.MSI has included little blue LEDs to demonstrate how many phases are currently being used too. These work better on the CPU socket, as the DDR3 and Southbridge LEDs are always on, and if the little lights annoy you, they can be turned off in the BIOS or via MSI's in-Windows overclocking software.
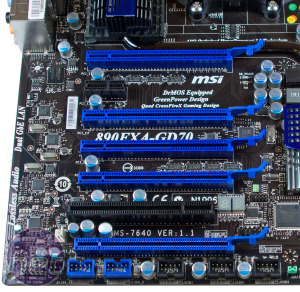
Like MSI’s previous 790FX design, the 890FX Northbridge and CPU power circuitry of this board are all cooled by a single large heatsink, which is then connected to the Southbridge heatsink by a single flat heatpipe. It looks neat and lets MSI squeeze in an impressive seven peripheral slots below, but the heatsink can get very hot.
When overclocking, we recommend blowing a fan directly at this heatsink, especially if you overvolt the Northbridge or CPU by a lot. Large side panel case fans should do the trick, but the effectiveness will depend on how much your graphics card and CPU cooler are blocking the fan.
Like many other Socket AM3 motherboards, large CPU coolers such as the popular Titan Fenrir also overhang the first two DIMM sockets, so tall memory can’t be used in these. However, we found that the outer two sockets can be used just as well. MSI has cleverly opted to use single-ended clips for its DIMM sockets, so even if large graphics cards are installed it’s easy to pop the memory in and out.
Other cool little features include a two-digit POST readout to debug overclocking and boot-up issues - quite frankly, all boards should have the POST readout because it makes life so much easier. There's also the OC Dial, which can be enabled in the BIOS to increase the HTT by pre-set amounts once your OS has booted. You can't change the voltages or multiplier ratios with this dial, but it could help more avid overclockers edge out that extra little bit.
However, this board does lack the voltage readout points that debuted on the MSI P55-GD65. Despite the high performance angle of this board, it seems strange not to include what was a popular and simple enthusiast feature on motherboards just six months ago. Still, we appreciate that these points add to the overall cost of a board, and that they’re far from essential for most people.
Rear I/O
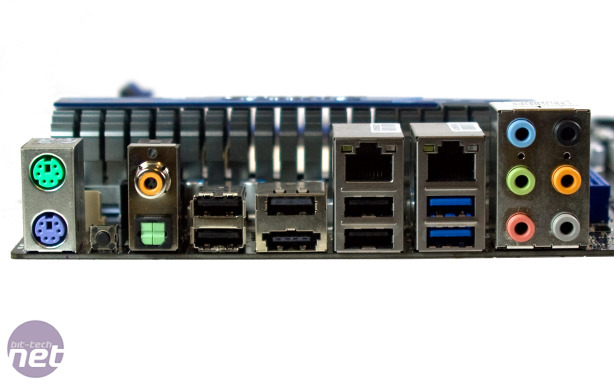
On the rear I/O there are eight USB ports - two of which are USB 3 and one is doubled up to provide a powered eSATA, although that standard has pretty much fallen on its face now.Two RJ45 sockets supply the two Gigabyte Ethernet connections, and there is PS/2 keyboard and mouse port, as well as both types of S/PDIF out and six 3.5mm stereo jacks for the HD audio. Nestled between the S/PDIF and PS2 ports is a tiny Clear CMOS button - one you'll no doubt get very familiar with using when overclocking.

MSI MPG Velox 100R Chassis Review
October 14 2021 | 15:04


Want to comment? Please log in.